Prepare App for Publishing and Deploy
Last Updated: July 2024
In this tutorial you will prepare the app for publishing and deployment. The app source code will be published to GitHub under an open source license. Among other things, this will allow you to track future changes to the app and it will allow others to view the code and modify it for their own use. Having the app code published on GitHub will also make it easier to download when installing the app on a production server.
The following topics are covered in this tutorial:
Sanitizing code for public publishing
README
Open Source Licenses
setup.py Metadata
Resource Files / Package Data
0. Start From Previous Solution (Optional)
If you wish to use the previous solution as a starting point:
git clone https://github.com/tethysplatform/tethysapp-earth_engine
cd tethysapp-earth_engine
git checkout -b rest-api-solution rest-api-solution-4.5
1. Move Service Account Credentials to Settings
Although using the gee/params.py file to store our service account credentials is convenient, it poses a potential risk of exposing sensitive information to the public. This could occur if this file is accidentally committed and pushed to GitHub. It will also be difficult to set these settings in a production environment, because the gee/params.py file will not be as easily accessible. To address this problem, you will create two custom app settings for storing this information in the database, instead of in a file.
Define two custom settings by appending the following method to the bottom of the
EarthEngineclass inapp.py:
from tethys_sdk.app_settings import CustomSetting
def custom_settings(self):
    """
    Custom settings.
    """
    custom_settings = (
        CustomSetting(
            name='service_account_email',
            type=CustomSetting.TYPE_STRING,
            description='Email associated with the service account.',
            default='',
            required=False,
        ),
        CustomSetting(
            name='private_key_file',
            type=CustomSetting.TYPE_STRING,
            description='Path to service account JSON file containing the private key.',
            default='',
            required=False,
        ),
    )
    return custom_settings
Replace the logic that authenticates the service account at the top of
gee/methods.pywith the following:
from ..app import App
service_account = App.get_custom_setting('service_account_email')
private_key_path = App.get_custom_setting('private_key_file')

if service_account and private_key_path and os.path.isfile(private_key_path):
    try:
        credentials = ee.ServiceAccountCredentials(service_account, private_key_path)
        ee.Initialize(credentials)
        log.info('Successfully initialized GEE using service account.')
    except EEException as e:
        log.warning('Unable to initialize GEE using service account. If installing ignore this warning.')
else:
    try:
        ee.Initialize()
    except EEException as e:
        log.warning('Unable to initialize GEE with local credentials. If installing ignore this warning.')
Remove the following import statement from the top of
gee/methods.py:
from . import params as gee_account
Use the private key path custom setting in
get_asset_dir_for_useringee/methods.pywith the following:
def get_asset_dir_for_user(user):
    """
    Get a unique asset directory for given user.

    Args:
        user (django.contrib.auth.User): the request user.

    Returns:
        str: asset directory path for given user.
    """
    with open(private_key_path) as f:
        private_key_contents = json.load(f)
        project_id = private_key_contents.get("project_id", None)

    asset_roots = ee.data.listAssets({'parent': f'projects/{project_id}/assets'}).get('assets', [])
    if len(asset_roots) == 0:
        asset_path = f'projects/{project_id}/assets/tethys'
        ee.batch.data.createAsset({
            'type': 'Folder',
            'name': asset_path
        })
        asset_roots = ee.data.listAssets({'parent': f'projects/{project_id}/assets'}).get('assets', [])

    asset_path = f"projects/{project_id}/assets/tethys"

    ...
You can also delete the get_earth_engine_credentials_path function from gee/methods.py as it is no longer needed.
Delete
gee/params.py.
2. Set Service Account Settings for the App
Navigate to http://localhost:8000/apps/earth-engine/.
Press the Settings button (button with gear icon) located on the right side of the header of the app.
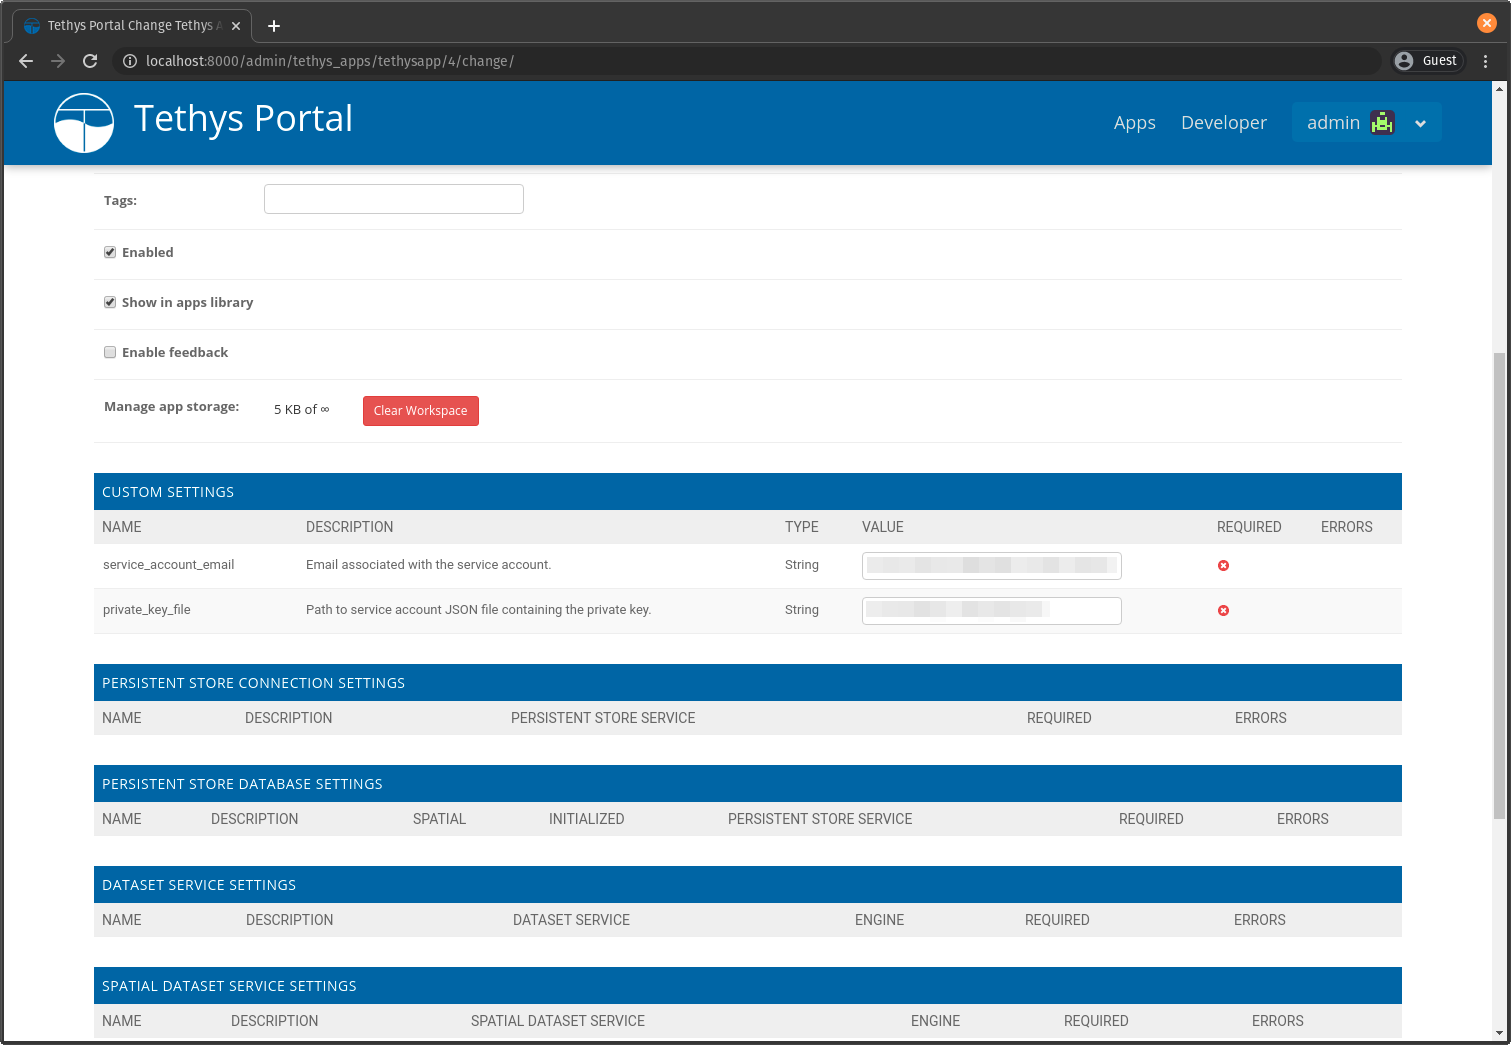
Scroll to the CUSTOM SETTINGS section of the settings page.
Enter the client email and the path to the key file as before in the
service_account_emailandprivate_key_filefields, respectively.Scroll to the bottom of the page and press the Save button.
Use the Apps link to navigate back to the apps library and launch the app.
Navigate to the Viewer page and verify that all of the viewer functionality is working: load dataset imagery, plot area of interest, and clipping by boundary.
3. Add a README
In this step you will create a README file with instructions for installing and using the app. GitHub support the Markdown syntax, so that will be used to add more structure to the README.
Create a new file called README.md in the same directory as the setup.py with the following contents:
# Earth Engine App

The Earth Engine is a Tethys App that demonstrates how to use Google Earth Engine to visualize remotely sensed datasets.

## Installation

Install the app with the Tethys Platform environment activated as follows:

```
# For development installations
tethys install -d

# For production installations
tethys install
```

## Settings

The app has two Custom Settings that can be used to configure the app to use a [Google Earth Engine service account](https://developers.google.com/earth-engine/guides/service_account):

* **service_account_email**: Email associated with the service account.
* **private_key_file**: Path to service account JSON file containing the private key.

## Authenticate for Development

Alternatively, you can authenticate with your personal Google Earth Engine account by running the following command:

```
earthengine authenticate
```

**WARNING**: Do not use personal Google Earth Engine credentials for a production installation.
4. Add a License File
In this step you will add an appropriate open source license to your project. This will allow others to legally reuse and modify your code. It provides a disclaimer that absovles you from any responsibility should your code not function properly.
Navigate to https://opensource.org/licenses and peruse the list of Popular License.
Click on the link for the BSD-3-Clause "New" or "Revised" license or a license of your choice.
Create a new file called
LICENSEin the same directory as thesetup.py.Copy the license text into the
LICENSEfile.Replace any values in angle brackets (e.g. <YEAR>) with appropriate values.
5. Add Metadata to Setup.py
In this step you will add appropriate metadata to the setup.py. This metadata will be used by packaging services such as the Python Package Index (PyPI) or Conda, should you choose to distribute your package on one of those platforms. It is also used by pip when a user lists information about an installed package. An explanation of possible setup keywords you can use can be found here: New and Changed setup() Keywords. As a minimum, you should set the version
Open
setup.py, located in the root directory of your app code.Replace the
setupfunction call with the following, replacing values in angle brackets with your information:
with open('README.md', 'r') as f:
    long_description = f.read()

setup(
    name=release_package,
    version='1.0.0',
    description='A Google Earth Engine demonstration Tethys App.',
    long_description=long_description,
    author='<YOUR NAME>',
    author_email='<YOUR EMAIL>',
    url='',  # The URL will be set in a future step.
    license='BSD-3-Clause',
    packages=find_namespace_packages(),
    package_data={'': resource_files},
    include_package_data=True,
    zip_safe=False,
    install_requires=dependencies,
)
Note
We recommend using semantic versioning for your projects. See: Introduction to Semantic Versioning and Semantic Versioning 2.0.0.
Tip
Using contents of the README.md as the long_description as demonstrated above is a best practice.
6. Verify Setup.py
In this step, you will reinstall the app to verify that the setup.py is free of errors.
Change into the directory containing your
setup.pyandinstall.ymland run the install command:
tethys install -d
Run the following command to list metadata about the app:
pip show tethysapp-earth_engine
Which should yield:
Name: tethysapp-earth-engine
Version: 1.0.0
Summary: A Google Earth Engine demonstration Tethys App.
Home-page: UNKNOWN
Author: <YOUR NAME>
Author-email: <YOUR EMAIL>
License: BSD 3-Clause
Location: <PATH TO CODE>
Requires:
Required-by:
7. Copy Resource Files
Up to this point, the app has been installed in development mode (tethys install -d). This means that the code that you have been working on has been linked to the Python site-packages directory so that the changes you make are immediately available to Python without needing to reinstall.
In a production environment you will want to install the app normally (tethys install). When a Python package is installed, the files are copied to the Python site-packages directory. By default, only Python files (with the py extension) are copied to the site-packages directory. Other types of files needed by a a Python package are referred to as "package data" or "resource files".
Resource files that are required by in Tethys Apps include CSS, JavaScript, HTML, and images. Open setup.py and inspect line 13:
resource_files = find_all_resource_files(app_package, TethysAppBase.package_namespace)
These lines use a helper function provided by Tethys Platform find_all_resource_files to automatically locate and include all files in the templates, public, and resources directories. If your app had additional directories with non-python files that need to be included, you would need to add calls to another helper function, find_resource_files, like so:
from tethys_apps.app_installation import find_resource_files

resource_files += find_resource_files(f'{TethysAppBase.package_namespace}/{app_package}/<OTHER RESOURCE FILES DIR>', f'{TethysAppBase.package_namespace}/{app_package}')
There are no additional resource files for the Earth Engine app, so no calls to find_resource_files are required.
8. Solution
This concludes this portion of the GEE Tutorial. You can view the solution on GitHub at https://github.com/tethysplatform/tethysapp-earth_engine/tree/prepare-publish-solution or clone it as follows:
git clone https://github.com/tethysplatform/tethysapp-earth_engine
cd tethysapp-earth_engine
git checkout -b prepare-publish-solution prepare-publish-solution-4.5