Tethys Compute Admin Pages
Last Updated: January 2022
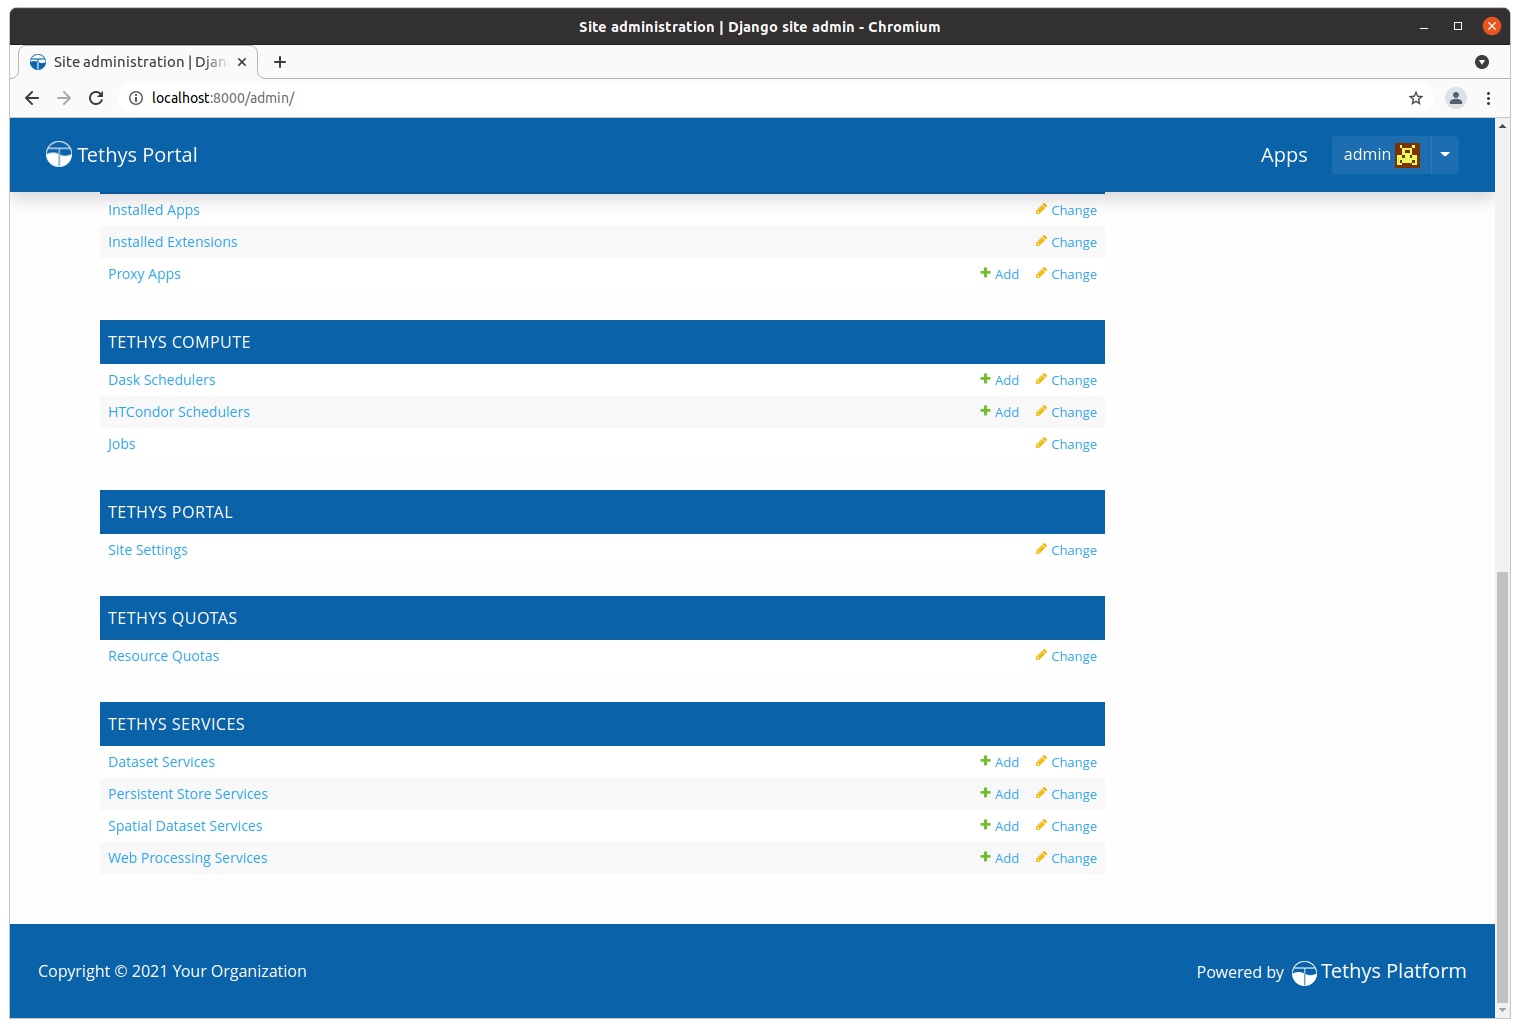
The TETHYS COMPUTE section of the site admin page allows an administrator to oversee jobs and configure schedulers for apps to use.
Schedulers
The two Scheduler sections of the Tethys Compute admin pages can be used to manage schedulers that are used by Tethys apps (see Jobs API for more details). There are two types of Schedulers that are supported by Tethys Platform: HTCondor Schedulers (HTCondor) and Dask Schedulers.
HTCondor Schedulers
Use the HTCondor Schedulers section to create (register) and manage the HTCondor schedulers that are needed by apps installed in the Tethys Portal. When creating a new HTCondor Scheduler, there are two required settings: Name and Host. The other options are for specifying authentication credentials when using a scheduler that is running on a different server that Tethys. Tethys Platform uses CondorPy to interact with the HTCondor Scheduler and CondorPy is capable of copying files and issuing commands to a remote scheduler via SCP/SSH.
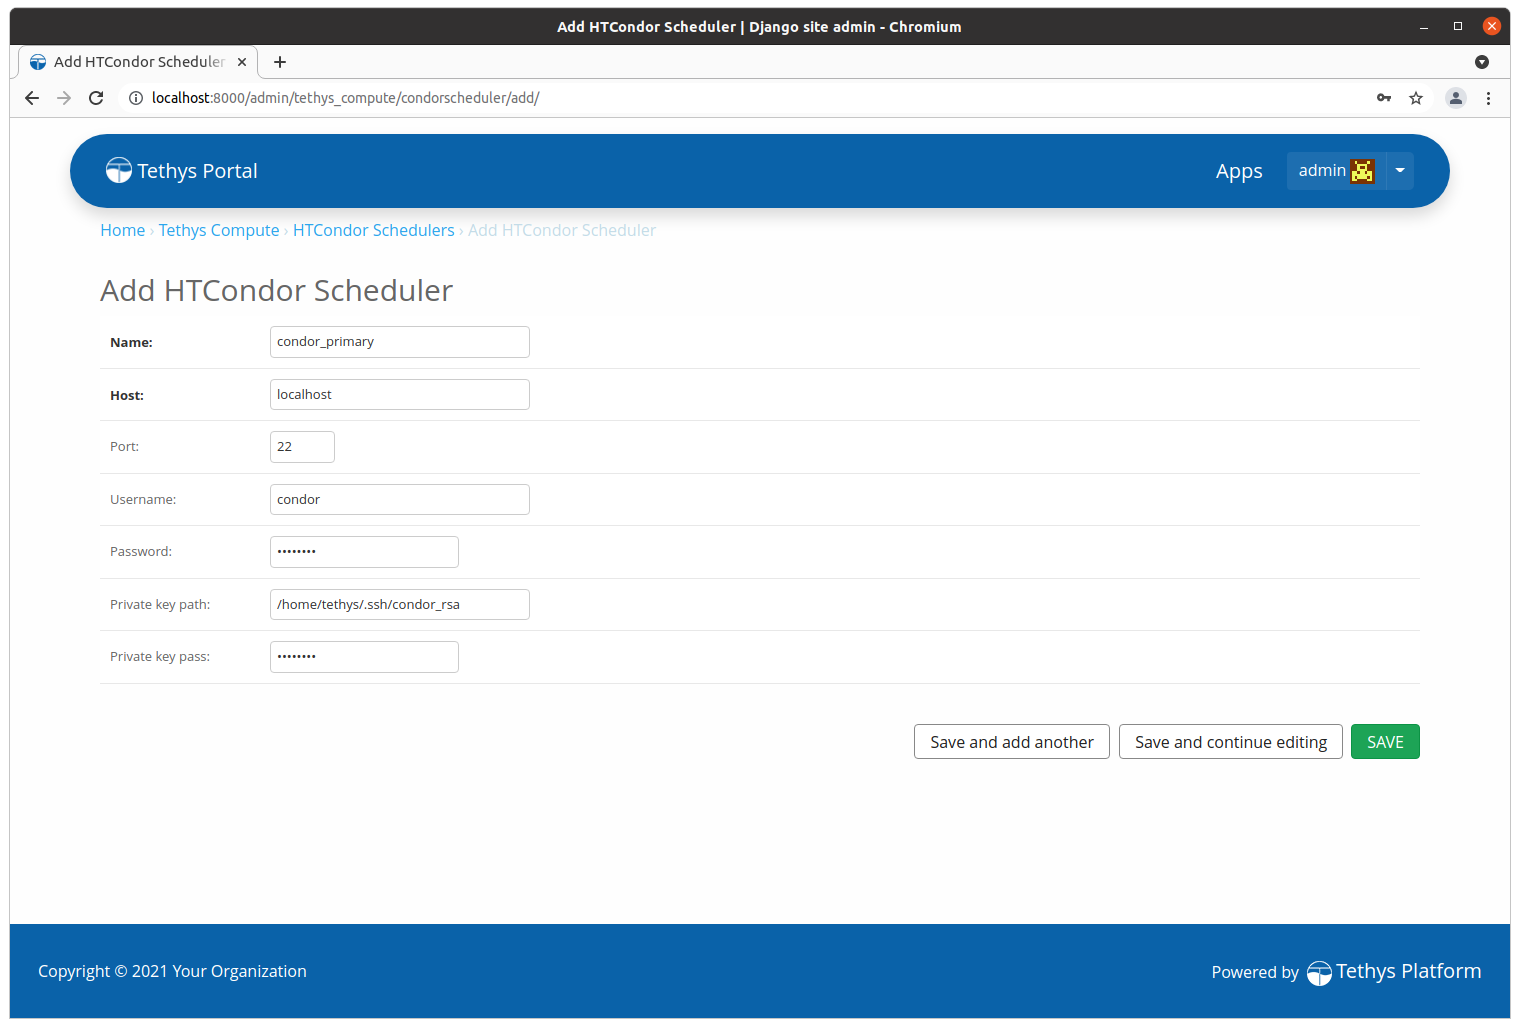
An explanation of the HTCondor Scheduler parameters follows:
Name: A name to refer to the scheduler. Can be any string, but must be unique among schedulers.
Host: The fully qualified domain name (FQDN) or the IP address of the HTCondor Scheduler.
Port: The SSH port on the remote server where the HTCondr scheduler is running. Defaults to 22. This is only used when the authentication parameters below are provided as well.
Username: The username that will be used to connect to the scheduler. The default username is 'root'.
Password: The password for the user specified by Username on the scheduler. Either a Password or a Private dey path must be specified.
Private key path: The absolute path to the private key that is configured with the scheduler. Either a Password or a Private dey path must be specified.
Private key pass: The passphrase for the private key. If there is no passphrase then leave this field blank.
Dask Schedulers
Use the Dask Schedulers section to create (register) and manage the Dask schedulers that are needed by apps installed in the Tethys Portal. When creating a new Dask Scheduler, there are two required settings: Name and Host. For detailed instructions for how to configure Dask Schedulers, see: Dask Tutorial: Setup Scheduler.
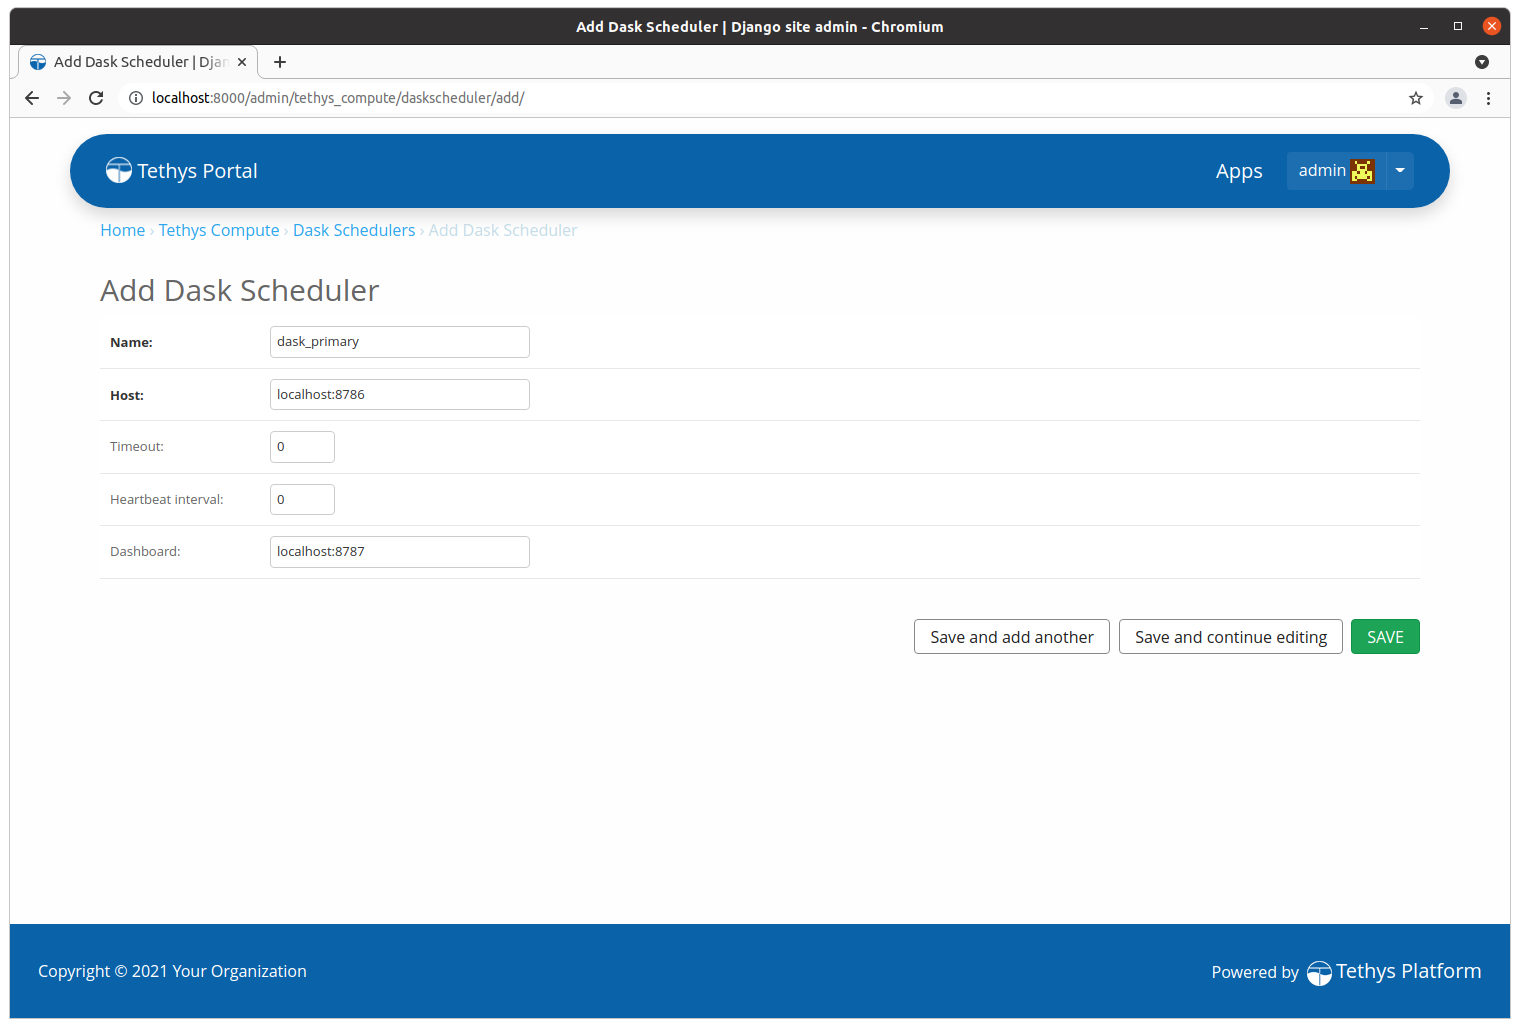
An explanation of the Dask Scheduler parameters follows:
Name: A name to refer to the scheduler. Can be any string, but must be unique among schedulers.
Host: The fully qualified domain name (FQDN) or the IP address of the Dask Scheduler. Can optionally contain the port (e.g. localhost:8786).
Timeout: Timeout duration for initial connection to the Dask Scheduler. Setting to 0 will cause the Dask client that is used by Tethys to use the default setting. Defaults to 0.
Heartbeat Interval: Time in milliseconds between heartbeats to Dask Scheduler. Setting to 0 will cause the Dask client that is used by Tethys to use the default setting. Defaults to 0.
Dashboard: The fully qualified domain name (FQDN) or the IP address of the Dask Dashboard app. Can optionally contain the port (e.g. localhost:8787).
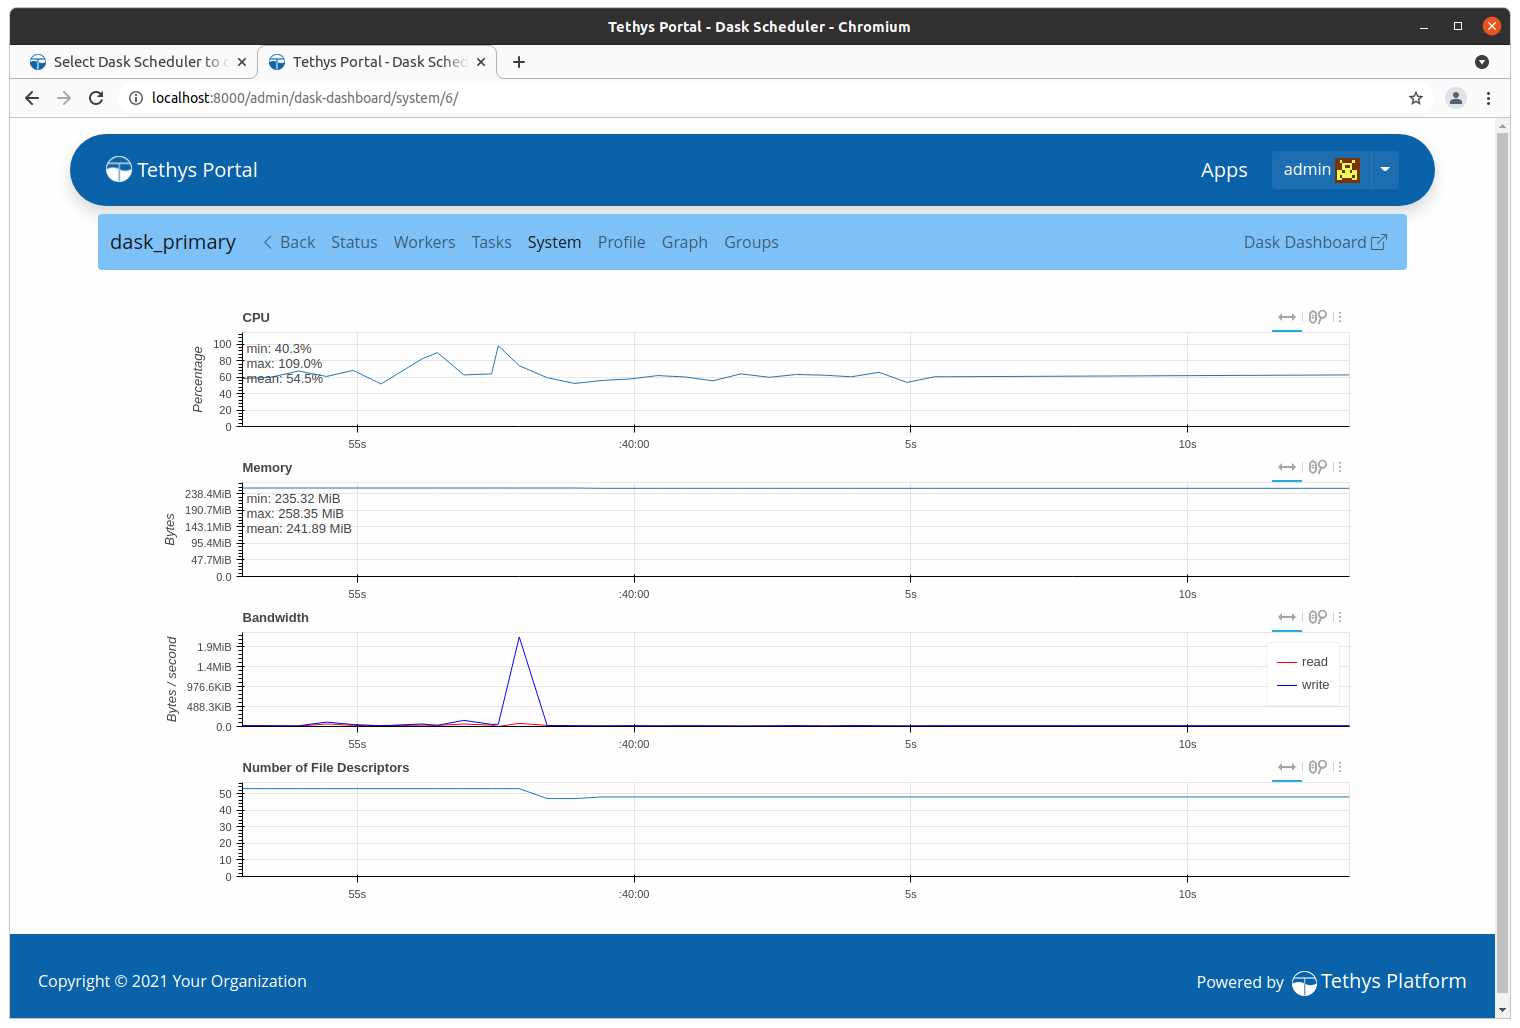
Embedded Dask Dashboard
If the Dashboard parameter is provided when creating a Dask Scheduler, a link to the Dashboard titled Launch Dashboard will be provided for that Scheduler.
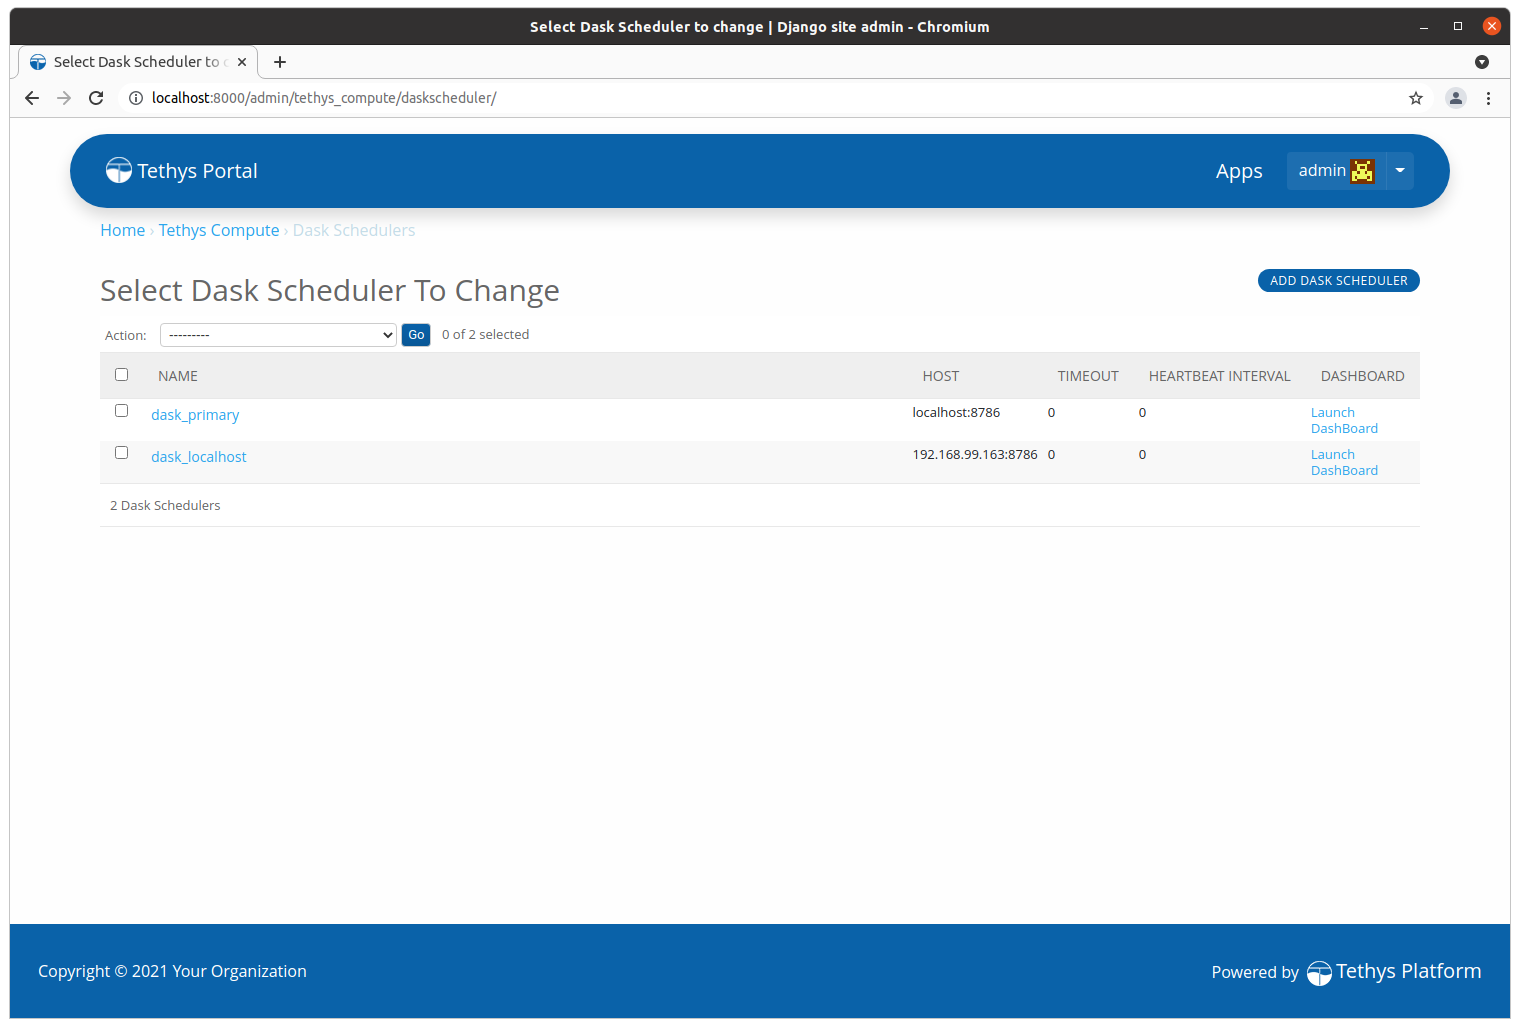
Figure 4. Dask Scheduelrs with Dashboard registered display Launch Dashboard links.
Clicking on the Launch Dashboard link will take you to an embedded version of the Dask dashboard app.
Jobs
Tethys Platform stores information about jobs that are created using the Jobs API. For each job that is created a database record is made to store some of the basic information about the job including: name, user, creation time, and status. The Jobs section in the Tethys Compute admin page allows for basic management of these database records. Jobs cannot be created in the admin pages, but they can be edited and removed.
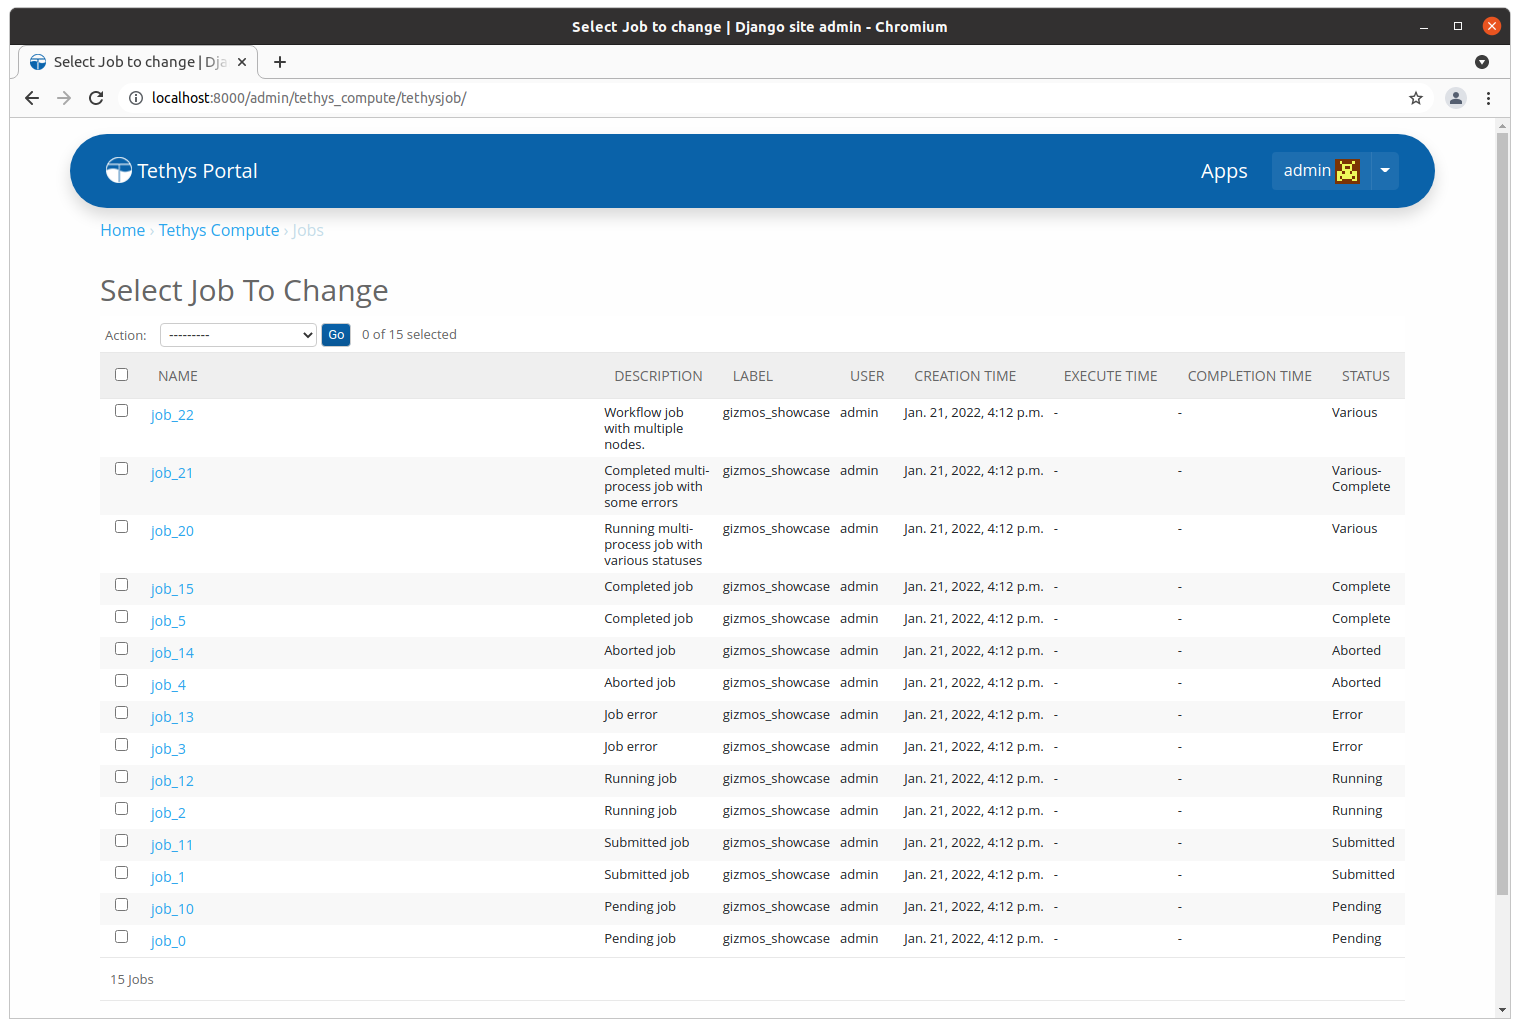
Figure 6. The administration page for Jobs tracked by Tethys Platform.