Setup Scheduler
Last Updated: August 2024
1. Start Scheduler
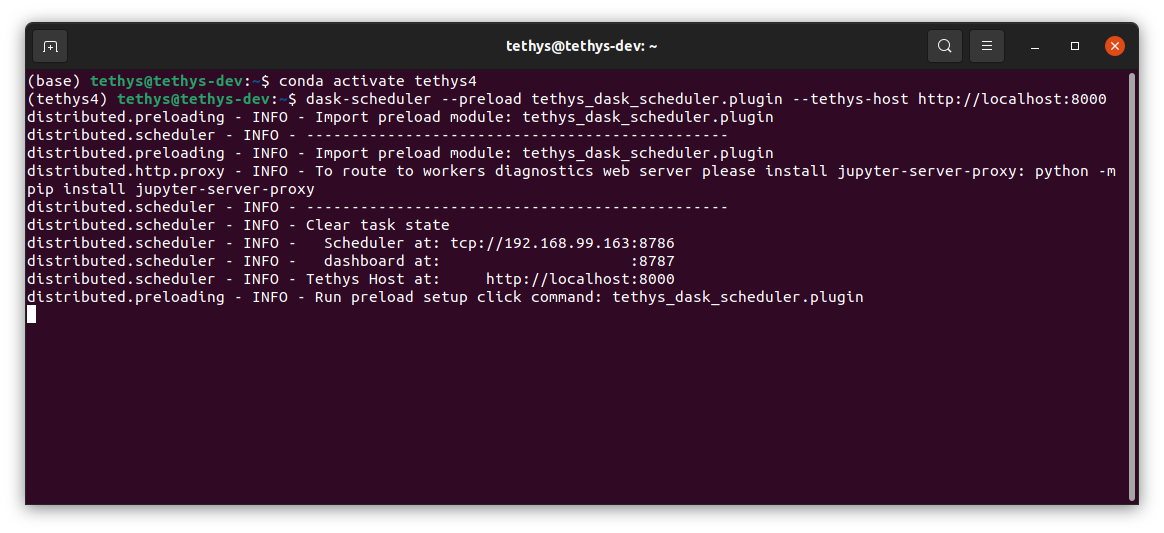
Open up a new terminal and make sure the tethys environment is activated. To start a Dask scheduler with the Tethys Dask Scheduler plugin active run:
dask-scheduler --preload tethys_dask_scheduler.plugin --tethys-host <tethys-host>
<tethys-host> is the host of the Tethys server you'd like to link this scheduler with (i.e.: http://localhost:8000).
Tip
Do not leave out the protocol (http/https) when specifying ''tethys_host'' address.
2. Start Worker
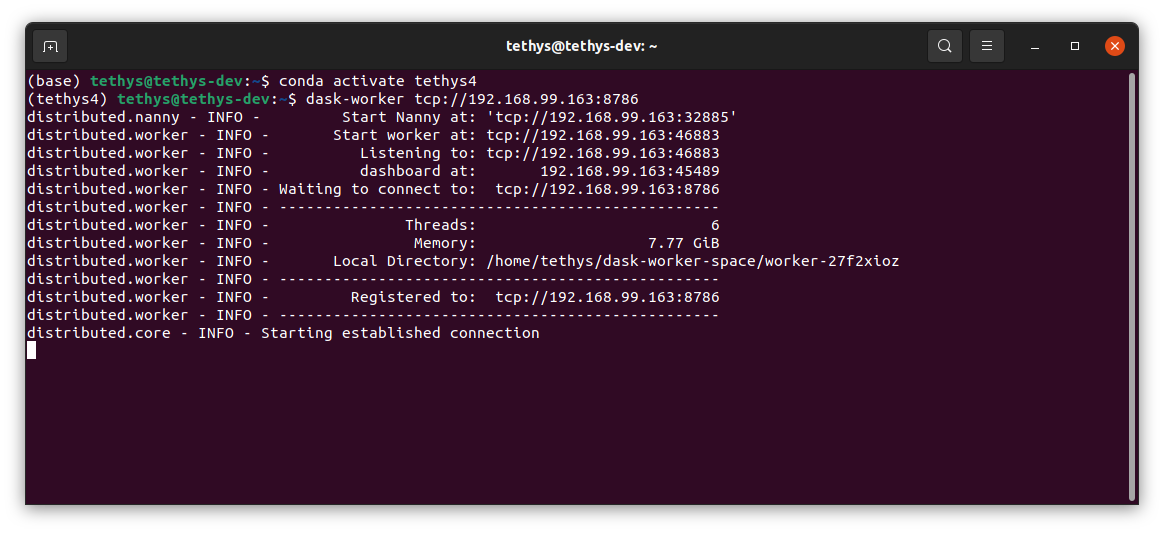
Open up a new terminal and make sure the tethys environment is activated. To start the worker run:
dask-worker <scheduler-host>
<scheduler-host> should be the same as the scheduler-at field from the previous command (e.g.: tcp://192.168.1.17:8786).
3. Log in to Tethys
Log in to tethys. For this tutorial use the username admin and the password pass.
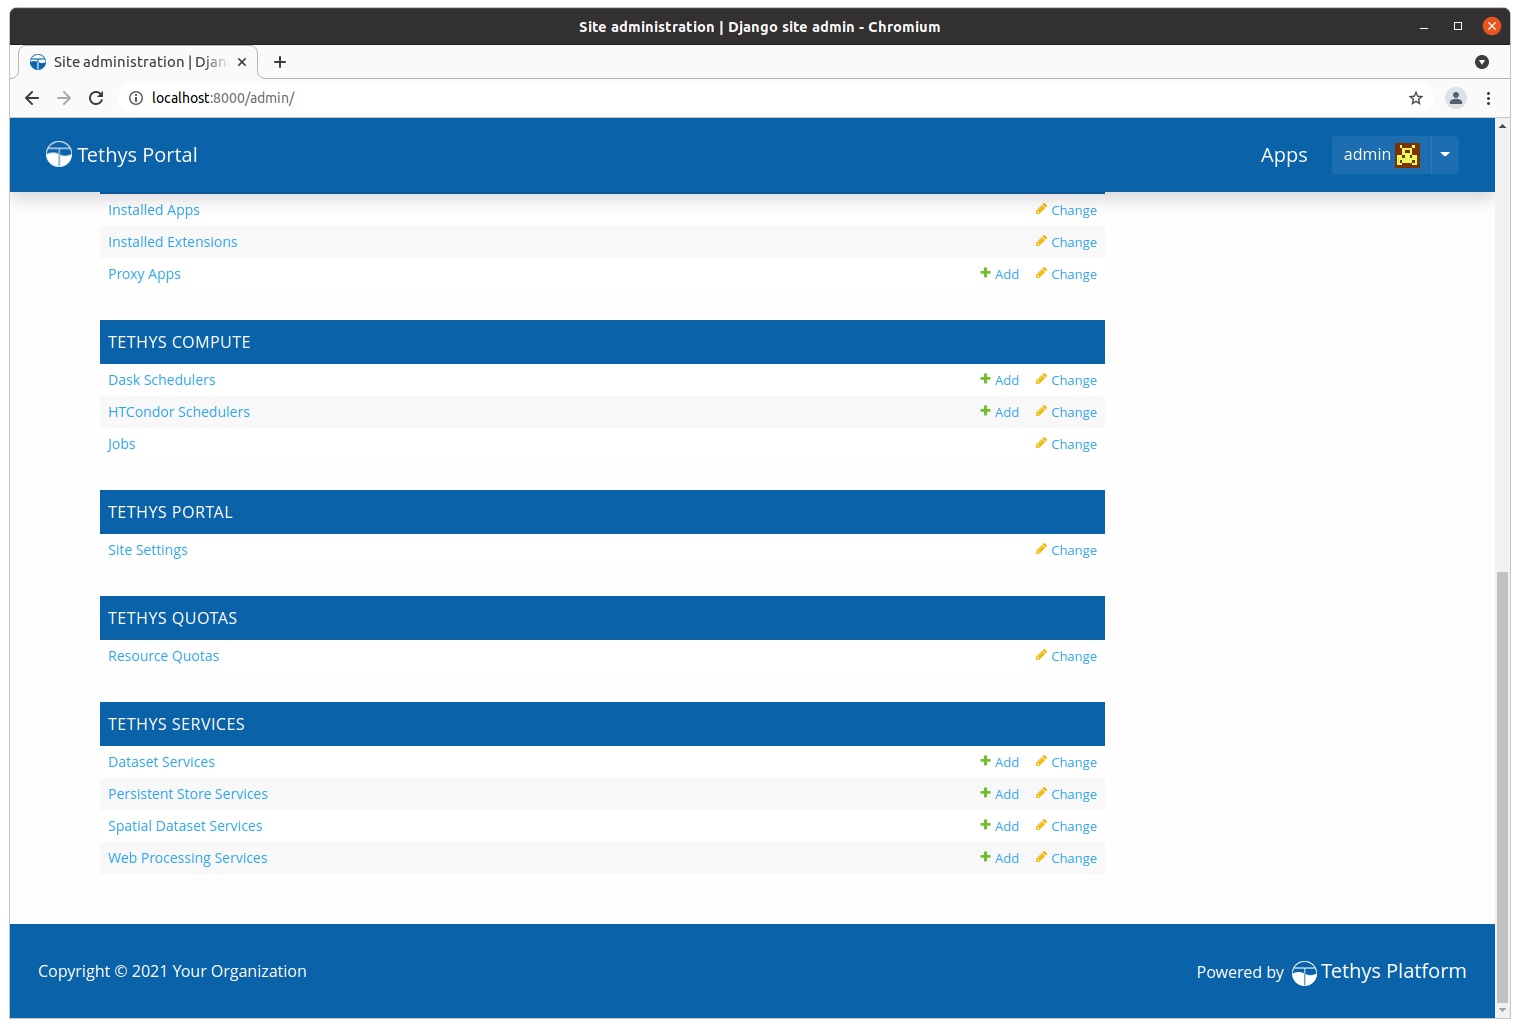
4. Go to Site Admin
Use the drop down menu in the top right corner near your username to navigate to the Site Admin page.
Note
If you are in an app, you will need to exit to the App Library page to access the drop down.
5. Dask Schedulers
Scroll down to the TETHYS COMPUTE section and select Dask Schedulers to navigate to the Dask Schedulers page.
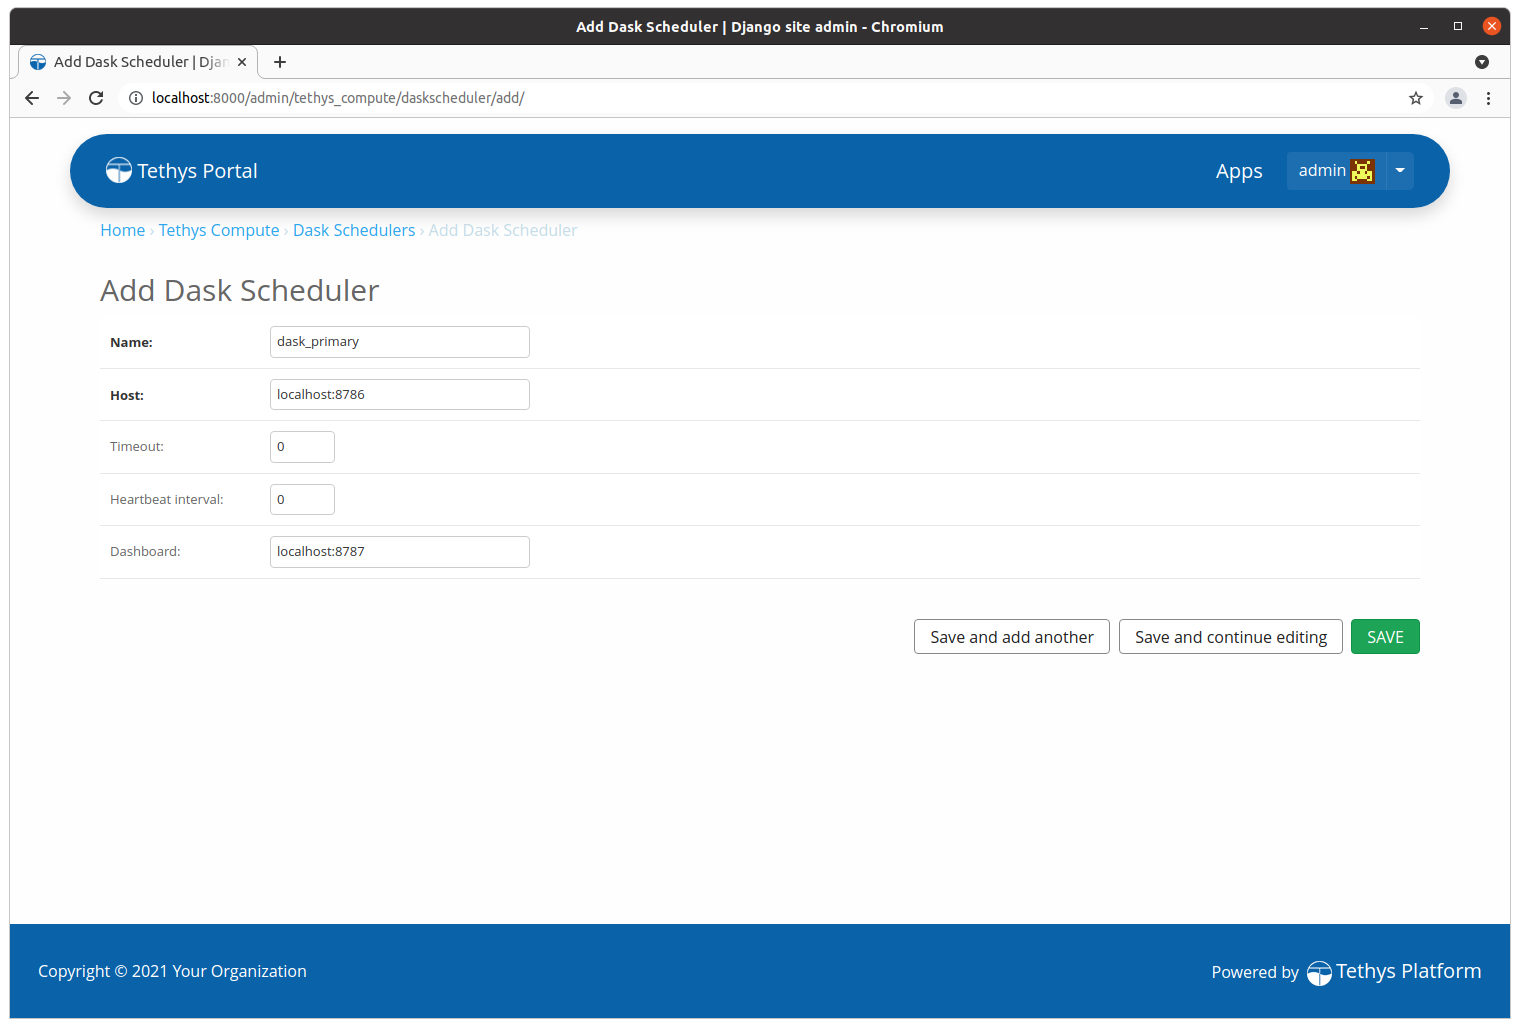
6. Add a New Dask Scheduler
Select the Add Dask Scheduler button. Fill out the following form to create a new scheduler. Use the name dask_localhost for this tutorial.
For host and port see the scheduler terminal. Use the scheduler at value (e.g.: 192.168.1.17:8786) for the Host field. Set Timeout to 60. Use the dashboard at
port with the scheduler at host (e.g.: 192.168.1.17:8787) for the Dashboard field, using the same host as the scheduler. Select Save once done.
Tip
Don't include the protocol (i.e.: tcp://) or suffix (i.e.: /status) when specifying the Host and Dashboard fields.
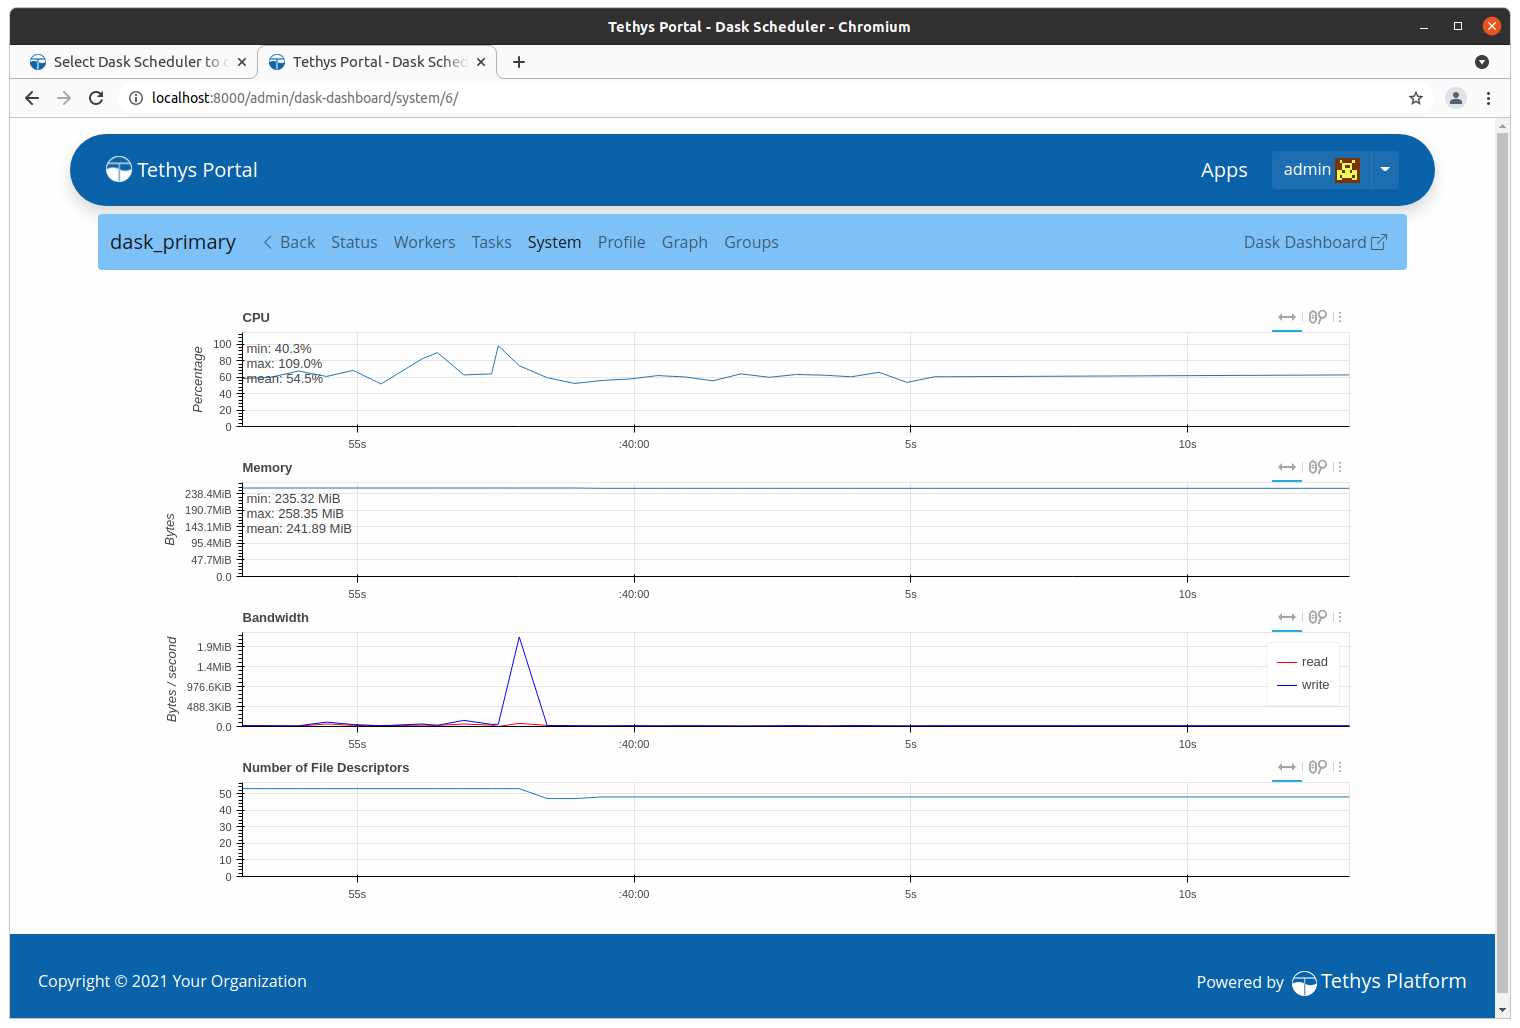
7. View Embedded Dashboard
Select the Launch Dashboard link to the right of your newly created dashboard to visit your embedded Dashboard. It should look like this.
8. Create Scheduler Setting
Add the scheduler_settings() method to the app class. Return a single SchedulerSetting object in a tuple as shown below. Set the name to dask_primary and engine to DASK:
from tethys_sdk.base import TethysAppBase
from tethys_sdk.app_settings import SchedulerSetting


class App(TethysAppBase):
    """
    Tethys app class for Dask Tutorial.
    """

    ...

    def scheduler_settings(self):
        scheduler_settings = (
            SchedulerSetting(
                name='dask_primary',
                description='Scheduler for a Dask distributed cluster.',
                engine=SchedulerSetting.DASK,
                required=True
            ),
        )

        return scheduler_settings
Tip
You may need to uninstall the app and reinstall it for the new scheduler setting to be loaded properly:
tethys uninstall dask_tutorial
tethys install -d
9. Assign Scheduler to App Setting
After reloading the app, login to the Tethys Portal as an admin user.
Navigate to the Site Admin page as described in Step 4.
Locate the TETHYS APPS section and click on the Installed Apps link.
Select the Dask Tutorial link from the list of installed apps.
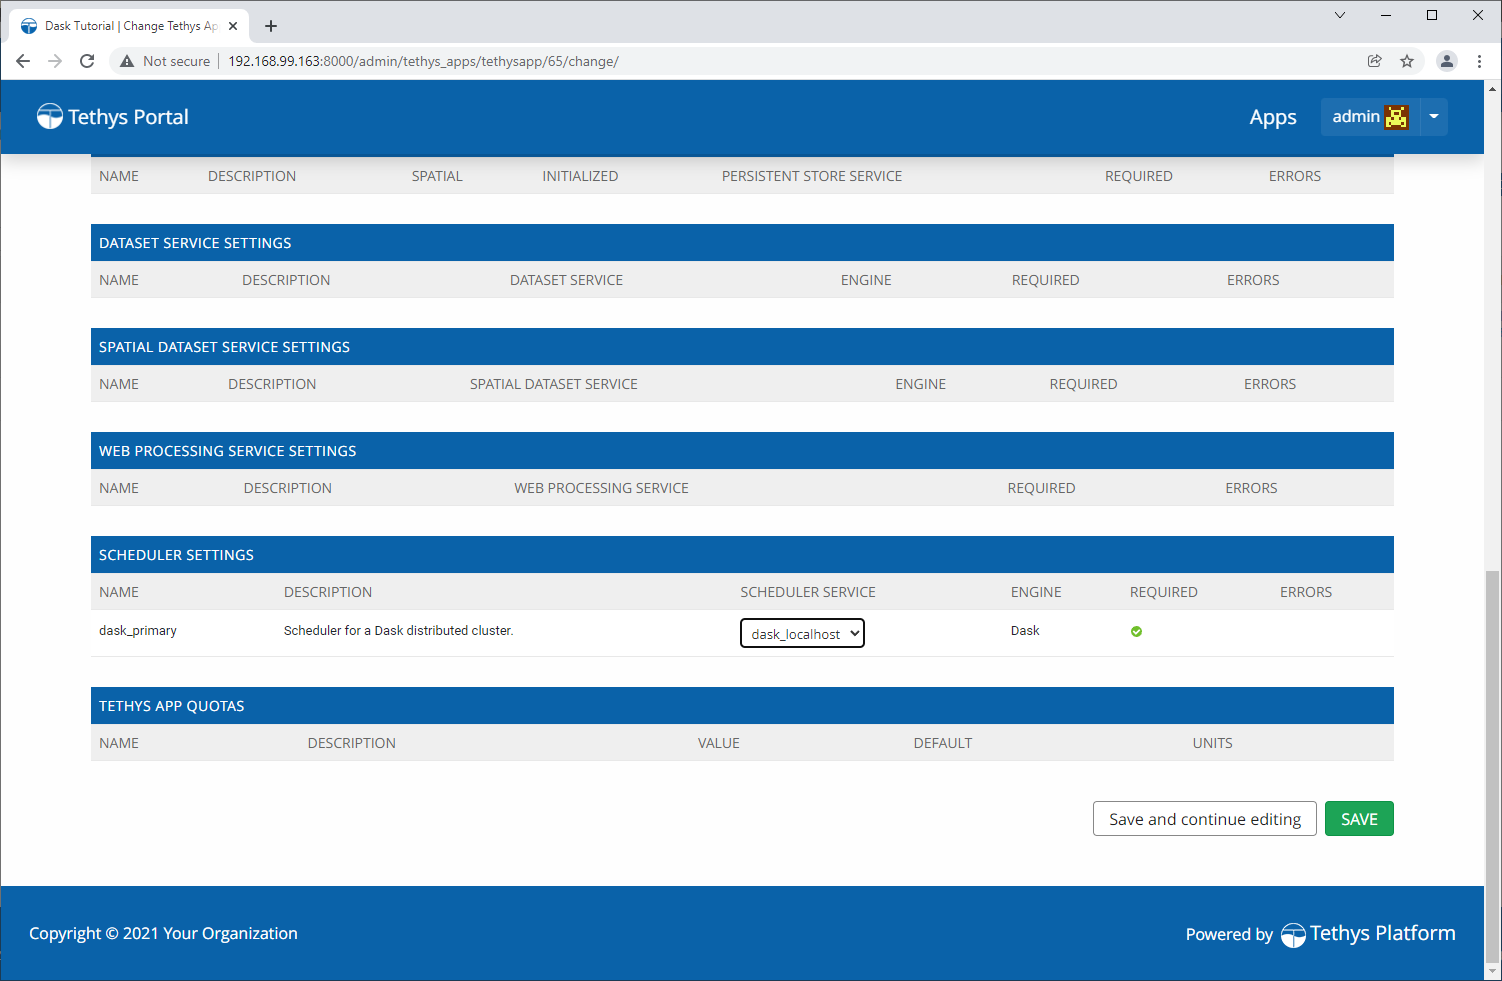
Scroll down to the SCHEDULER SETTINGS section and locate the row with the setting named
dask_primary.Use the dropdown in the SCHEDULER SERVICE column to select the
dask_localhostscheduler that you configured in step 6.Press the
SAVEbutton to save the changes.
10. Solution
View the solution on GitHub at https://github.com/tethysplatform/tethysapp-dask_tutorial or clone it as follows:
git clone https://github.com/tethysplatform/tethysapp-dask_tutorial
cd tethysapp-dask_tutorial
git checkout -b setup-scheduler-solution setup-scheduler-solution-4.5