Dask Distributed
Last Updated: November 2019
This section will illustrate how to use the dask.distributed API with DaskJob in Tethys. This example also illustrates how to use a custom process results function.
1. Add Job Function
Add a new function to the job_functions.py module that builds the same Dask job as before using the dask.distributed API approach:
# Distributed Job
def distributed_job(client):
    output = []
    for x in range(3):
        a = client.submit(inc, x, pure=False)
        b = client.submit(double, x, pure=False)
        c = client.submit(add, a, b, pure=False)
        output.append(c)
    return client.submit(sum_up, output)
2. Setup the Controller
Modify the home controller in the controller.py module, adding a button to the context that will launch the Dask Distributed job. Afterwards the home function should look like this:
...
@login_required()
def home(request):
    """
    Controller for the app home page.
    """
    dask_delayed_button = Button(
        display_text='Dask Delayed Job',
        name='dask_delayed_button',
        attributes={
            'data-toggle': 'tooltip',
            'data-placement': 'top',
            'title': 'Dask Delayed Job'
        },
        href=reverse('dask_tutorial:run-dask', kwargs={'job_type': 'delayed'})
    )

    dask_distributed_button = Button(
        display_text='Dask Distributed Job',
        name='dask_distributed_button',
        attributes={
            'data-toggle': 'tooltip',
            'data-placement': 'top',
            'title': 'Dask Future Job'
        },
        href=reverse('dask_tutorial:run-dask', kwargs={'job_type': 'distributed'})
    )

    jobs_button = Button(
        display_text='Show All Jobs',
        name='dask_button',
        attributes={
            'data-toggle': 'tooltip',
            'data-placement': 'top',
            'title': 'Show All Jobs'
        },
        href=reverse('dask_tutorial:jobs-table')
    )

    context = {
        'dask_delayed_button': dask_delayed_button,
        'dask_distributed_button': dask_distributed_button,
        'jobs_button': jobs_button,
    }

    return render(request, 'dask_tutorial/home.html', context)

...
Additionally update the run_job controller in controller.py to look like:
...
@login_required()
def run_job(request, job_type):
    """
    Controller for the app home page.
    """
    # Get test_scheduler app. This scheduler needs to be in the database.
    scheduler = get_scheduler(name='test_scheduler')

    if job_type.lower() == 'delayed':
        from tethysapp.dask_tutorial.job_functions import delayed_job

        # Create dask delayed object
        delayed = delayed_job()
        dask = job_manager.create_job(
            job_type='DASK',
            name='dask_delayed',
            user=request.user,
            scheduler=scheduler,
        )

        # Execute future
        dask.execute(delayed)

    elif job_type.lower() == 'distributed':
        from tethysapp.dask_tutorial.job_functions import distributed_job, convert_to_dollar_sign

        # Get the client to create future
        try:
            client = scheduler.client
        except DaskJobException:
            return redirect(reverse('dask_tutorial:error_message'))

        # Create future job instance
        future = distributed_job(client)
        dask = job_manager.create_job(
            job_type='DASK',
            name='dask_distributed',
            user=request.user,
            scheduler=scheduler,
        )
        dask.process_results_function = convert_to_dollar_sign
        dask.execute(future)

    return HttpResponseRedirect(reverse('dask_tutorial:jobs-table'))
...
3. Setup HTML
Modify the app_content block in the home.html so that it looks like the following:
...
{% block app_content %}
<h2>Dask Delayed Job</h2>
{% gizmo dask_delayed_button %}

<h2>Dask Distributed Job</h2>
{% gizmo dask_distributed_button %}
{% endblock %}
...
4. Review Dask Distributed
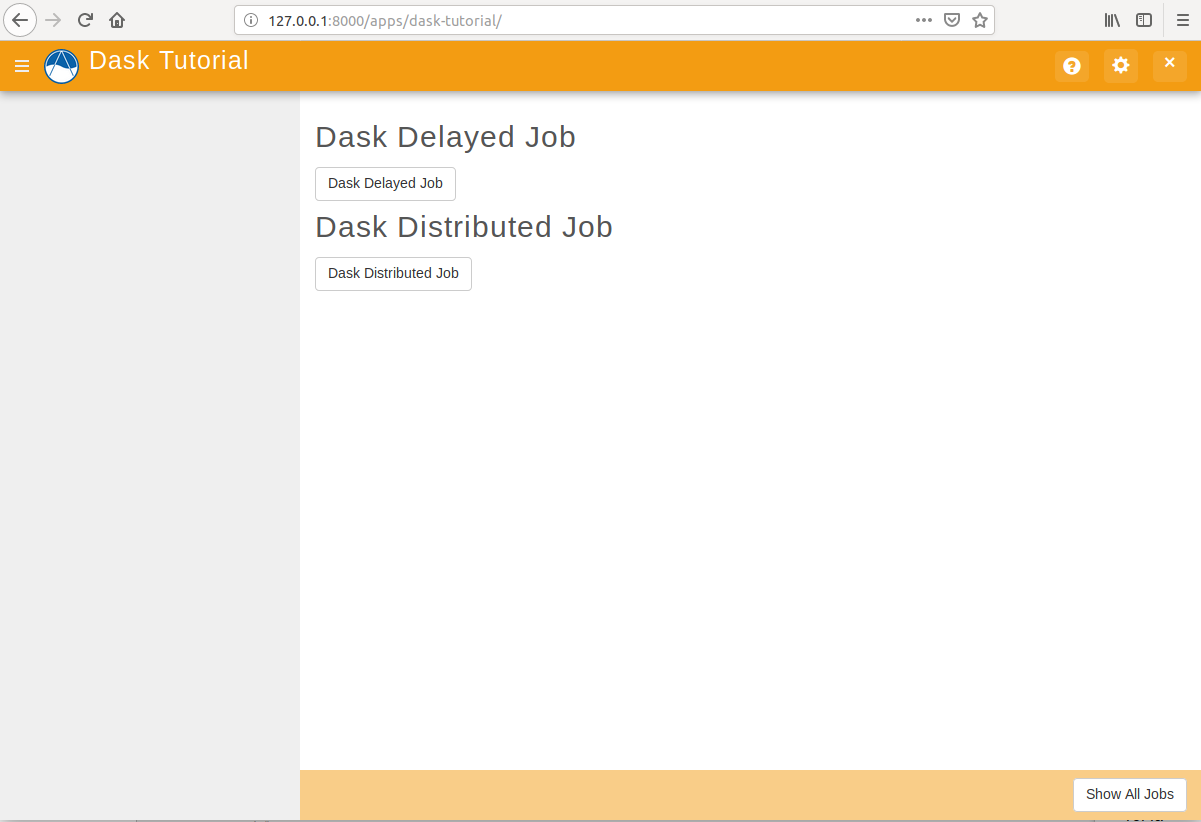
If your tethys project does not restart on its own, you may need to do so manually by ending the server with ctrl+c, and then entering the command tethys manage start again. Now when you navigate to your app page, you should see this:
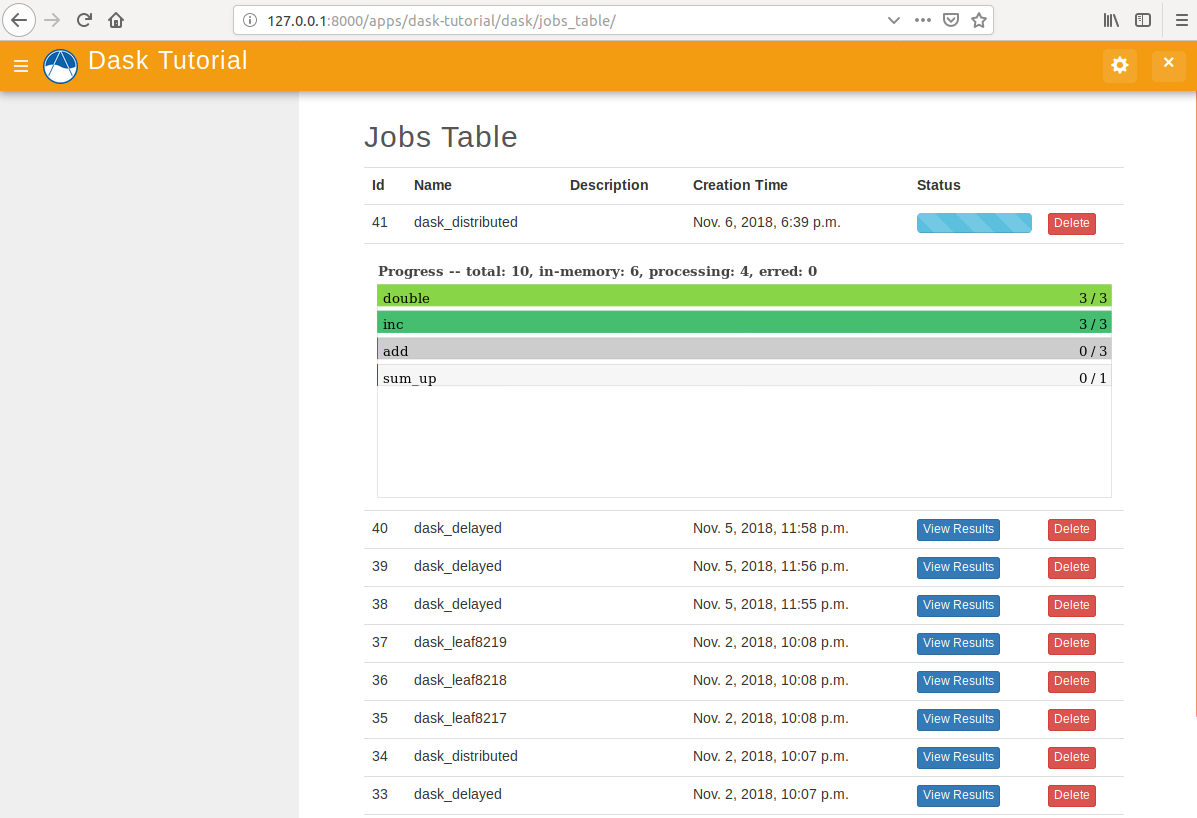
Click on the Dask Distributed Job button to launch the new job type. It will submit the job and redirect to the jobs table page:
Tip
If you get stuck, compare with the solution here: https://github.com/tethysplatform/tethysapp-dask_tutorial