Administrator Pages
Last Updated: October 2021
Tethys Portal includes administration pages that can be used to manage the website (see Figure 1). The administration dashboard is only available to administrator users (staff users). You should have created a default administrator user when you installed Tethys Platform. If you are logged in as an administrator, you will be able to access the administrator dashboard by selecting the "Site Admin" option from the user drop down menu in the top right-hand corner of the page (when you are not in an app).
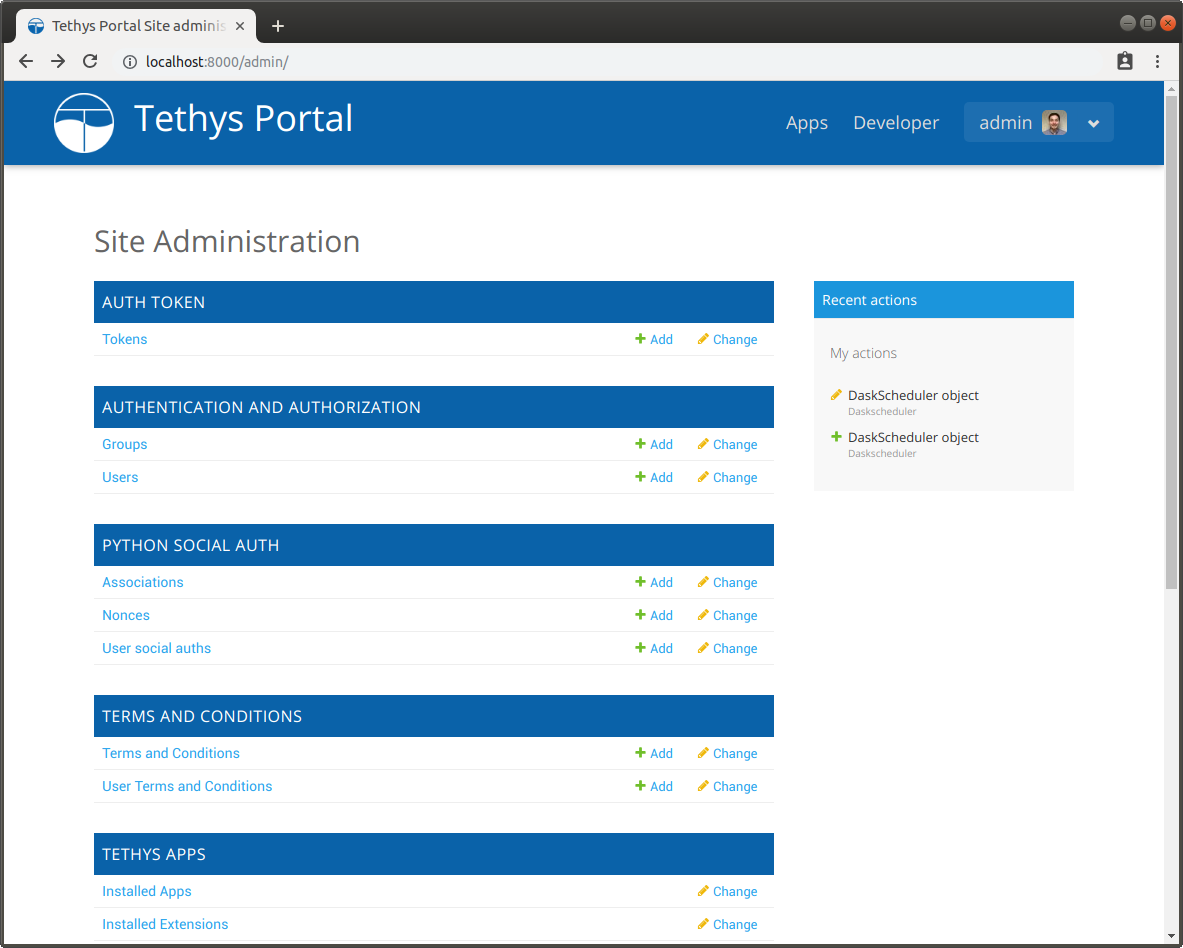
Figure 1. Administrator dashboard for Tethys Portal.
Note
If you did not create an administrator user during installation, run the following command in the terminal:
tethys manage createsuperuser
Auth Token
Tethys REST API tokens for individual users can be managed using the Tokens link under the AUTH TOKEN heading (see Figure 2).
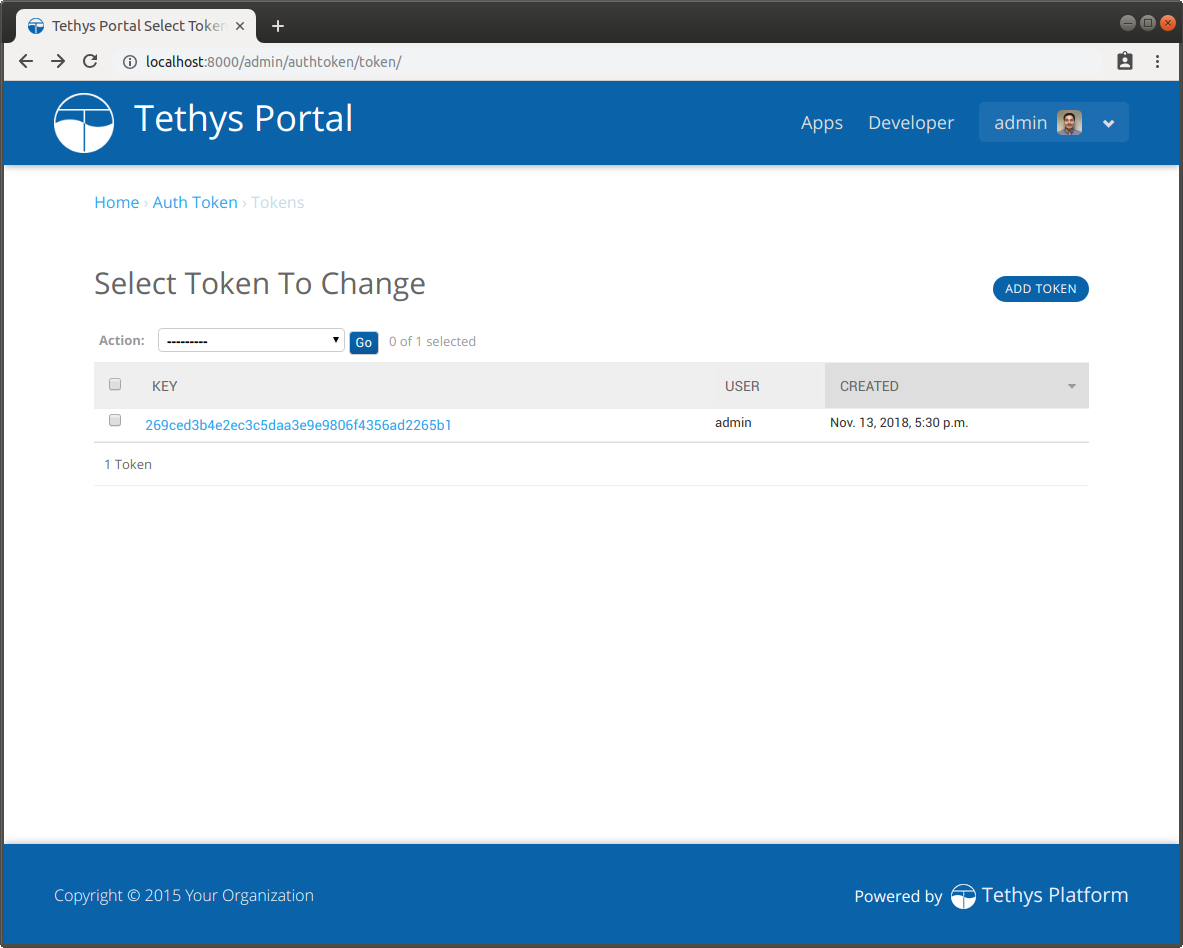
Figure 2. Auth Token management page for Tethys Portal.
Authentication and Authorization
Permissions and users can be managed from the administrator dashboard using Users link under the AUTHENTICATION AND AUTHORIZATION heading. Figure 3 shows an example of the user management page for a user named John.
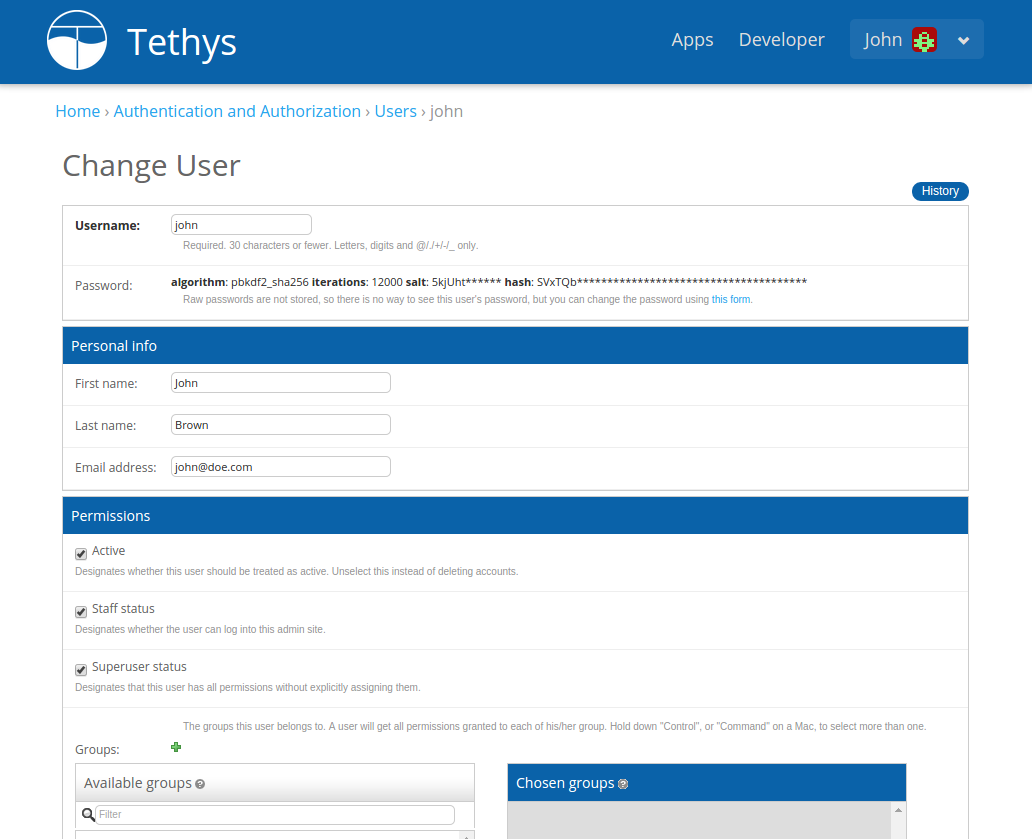
Figure 3. User management for Tethys Portal.
Assign App Permission Groups
To assign an app permission group to a user, select the desired user and locate the Groups dialog under the Permissions heading of the Change User page. All app permission groups will appear in the Available Groups list box. Assigning the permission group is done by moving the permission group to the Chosen Groups list box. Although the permissions may also appear in the User Permissions list box below, they cannot be properly assigned in the Change User dialog.
Assign App Access Permissions
Administrators of Tethys Portal can control access to each app in the portal. However, this feature is disabled by default. To enable app access control set the following setting in the portal_config.yaml:
settings:
  TETHYS_PORTAL_CONFIG:
    ENABLE_RESTRICTED_APP_ACCESS: True
Caution
The effect of the ENABLE_RESTRICTED_APP_ACCESS setting is negated if ENABLE_OPEN_PORTAL is also set to True.
There are two ways to assign app permissions to users and groups. The first method is to use the Change Group page from the Group section of the administrator dashboard. The second method is using the object permission button from the Change Tethys App page of each individual installed app. The first method is recommended over the second one when working with app permissions at the group level because it offers a more responsive interface and it facilitates working with multiple permissions from different apps and groups at the same time. Both methods are described below.
Change Group Method (Recommended)
To assign app permissions to a user using the Change Group method, go to the administrator dashboard and select the Groups link under the Authentication and Authorization heading. Select the link with the group name from the list. On the Change Group page you can assign a group permissions to access a specific app from the Apps multiselect field by moving an app from the available app box to the chosen app box. Once an app is added to the chosen apps box, the form will dynamically display all the permissions and groups associated with that app if there are any. Individual permissions can be added to the group by moving the permissions from the available box of the specific app to the chosen box. In addition, all the permissions from another group that are associated to the specific app can also be added by moving the specific group from the available groups box to the chosen groups box. The Change Group form then needs to be saved for changes to take effect.
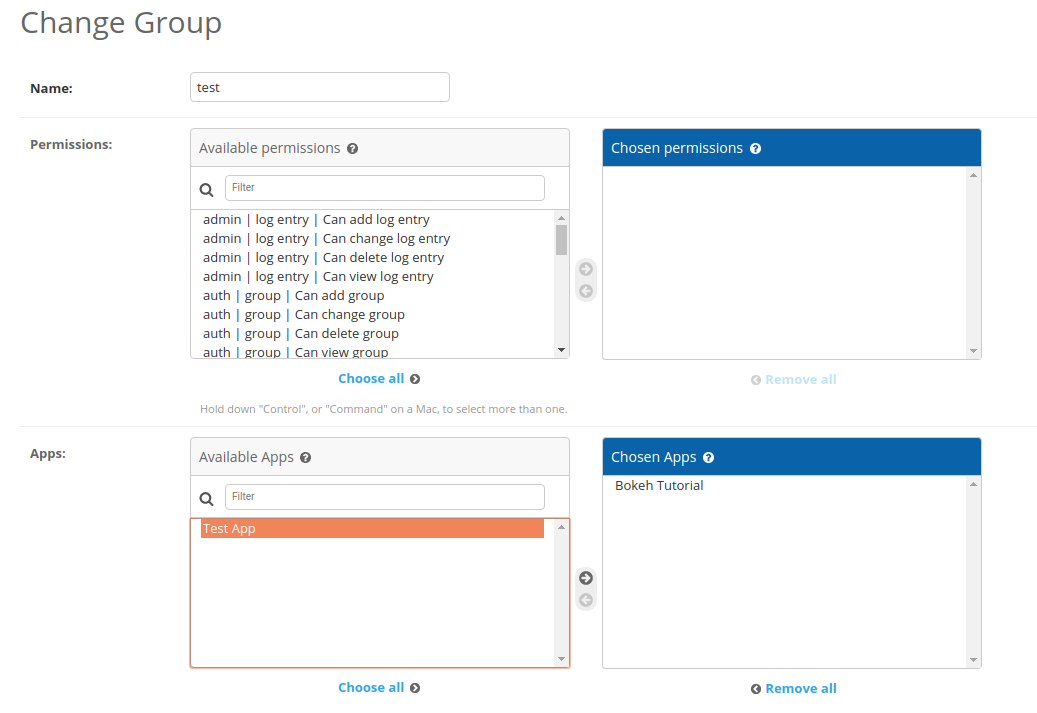
Figure 4. Change Group - Add app access.
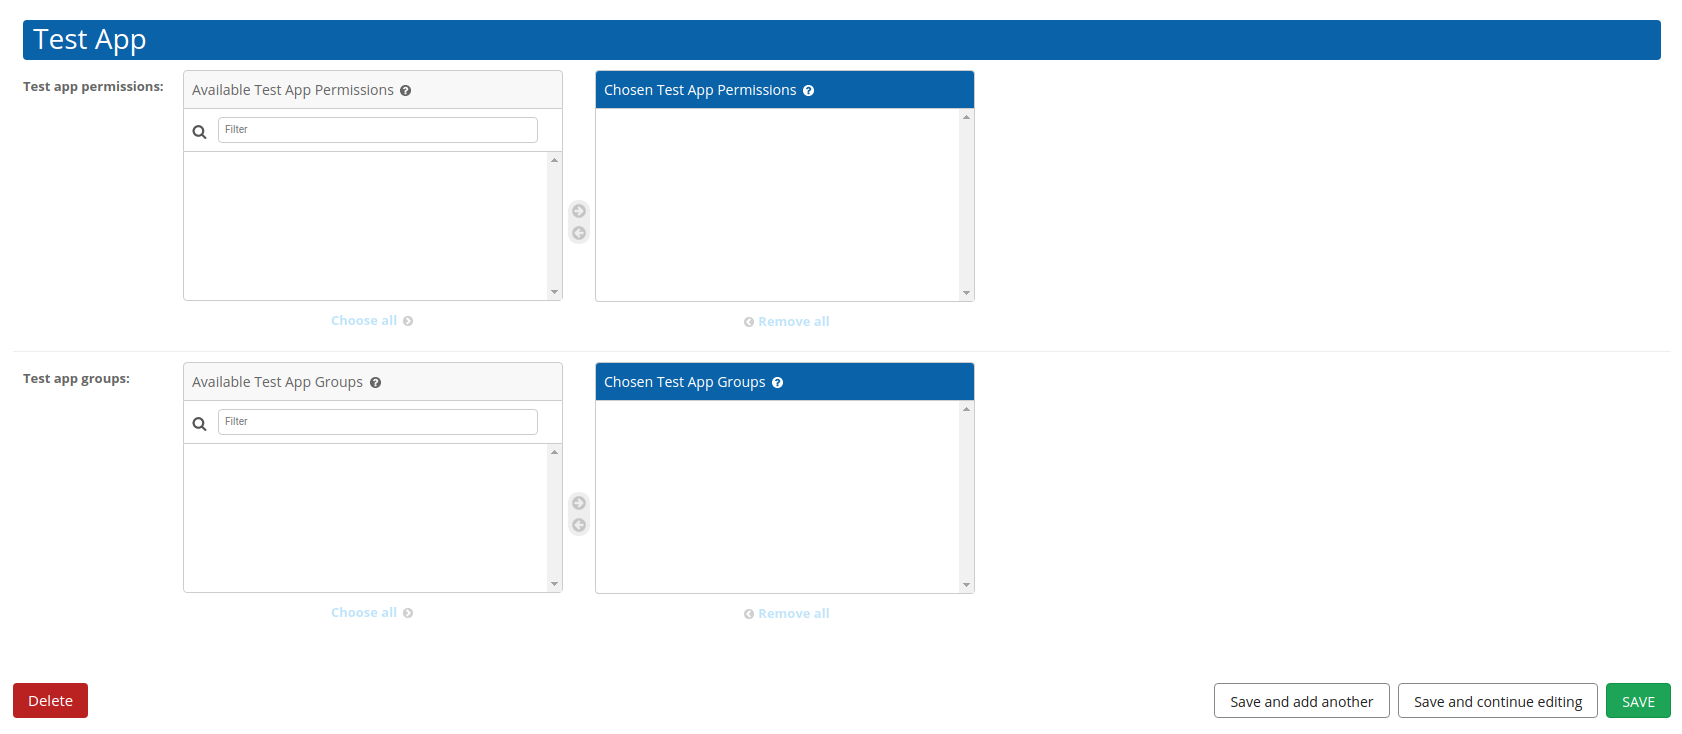
Figure 5. Change Group - Add permissions from available permissions or groups.
Note
Since assigning the individual app permissions one by one can be a cumbersome process, we highly recommend that you use the Change Group page when working with multiple app permissions.
Object Permissions Method
To assign a singular app permission to a user using the Change Tethys App page, go to the administrator dashboard and scroll down to the Installed Apps link under the Tethys Apps heading. Select the link with the app name from the list. In the upper right corner of the Change Tethys App page click the Object Permissions button (see Figure 4). On the Object Permissions page you can assign app specific permissions to a user by entering the username in the User Identification field and press the Manage user button (see Figure 5). The same method can be used to add app permissions to a group using the Group section of the Object Permissions page.

Figure 6. Object Permissions button.
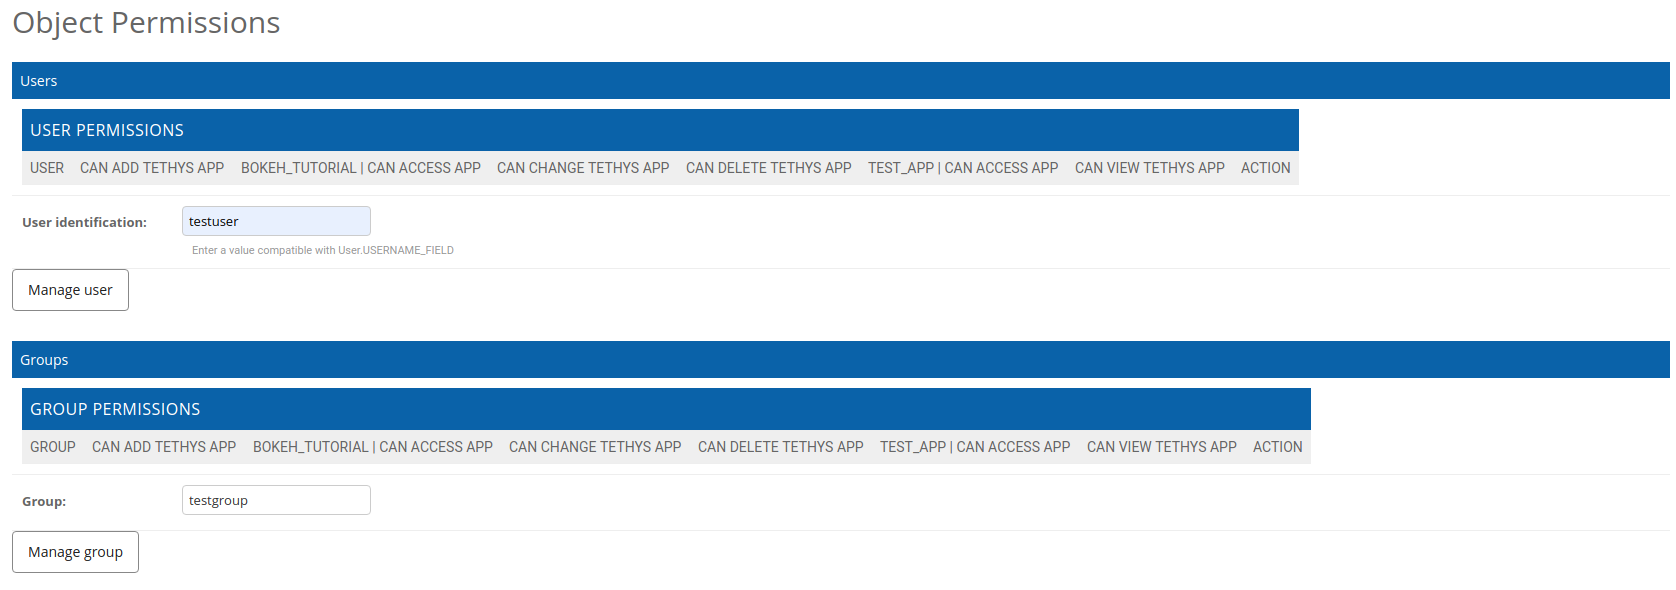
Figure 7. Object Permissions page.
Previously added App permissions can also be edited using this page.
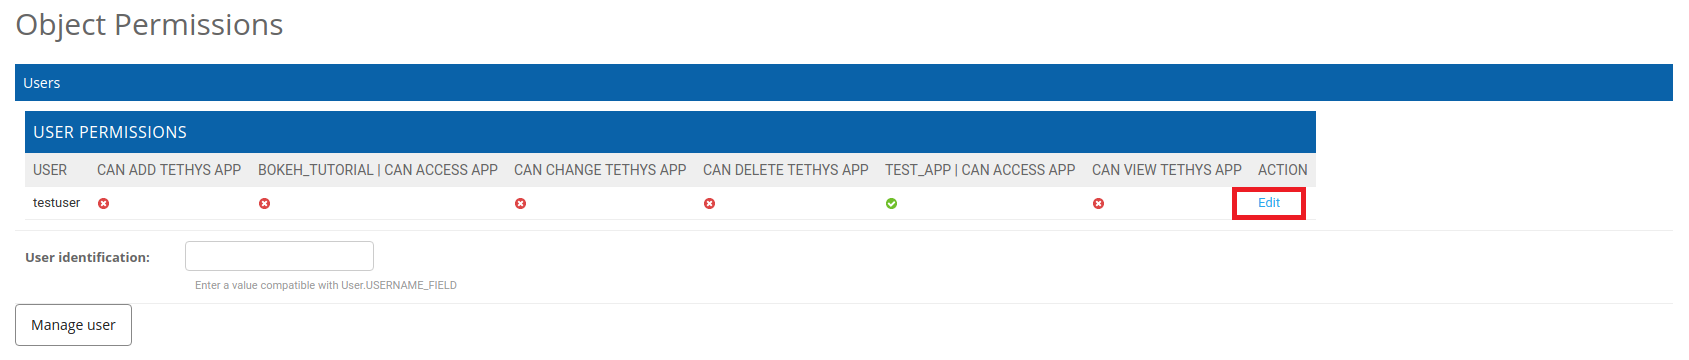
Figure 8. Link to edit Object Permissions.
Anonymous User
The AnonymousUser can be used to assign permissions and permission groups to users who are not logged in. This means that you can define permissions for each feature of your app, but then assign them all to the AnonymousUser if you want the app to be publicly accessible.
Terms and Conditions
Portal administrators can manage and enforce portal wide terms and conditions and other legal documents via the administrator pages.
Use the Terms and Conditions link to create new legal documents (see Figure 9). To issue an update to a particular document, create a new entry with the same slug (e.g. 'site-terms'), but a different version number (e.g.: 1.10). This allows you to track multiple versions of the legal document and which users have accepted each. The document will not become active until the Date active field has been set and the date has past.
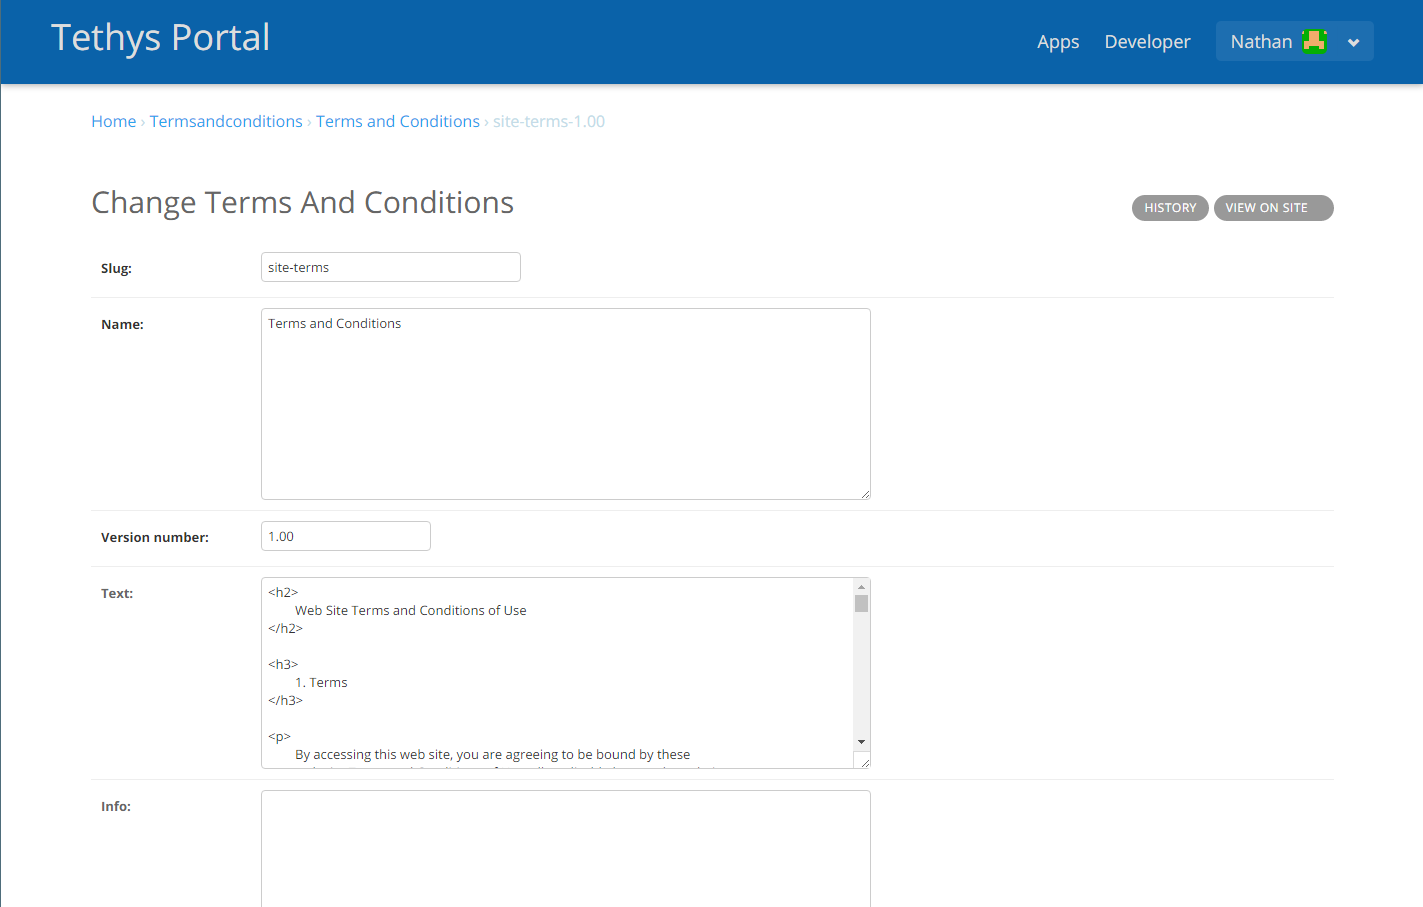
Figure 9. Creating a new legal document using the terms and conditions feature.
When a new document becomes active, users will be presented with a modal prompting them to review and accept the new terms and conditions (see Figure 10). The modal can be dismissed, but will reappear each time a page is refreshed until the user accepts the new versions of the legal documents. The User Terms and Conditions link shows a record of which users have accepted the terms and conditions.
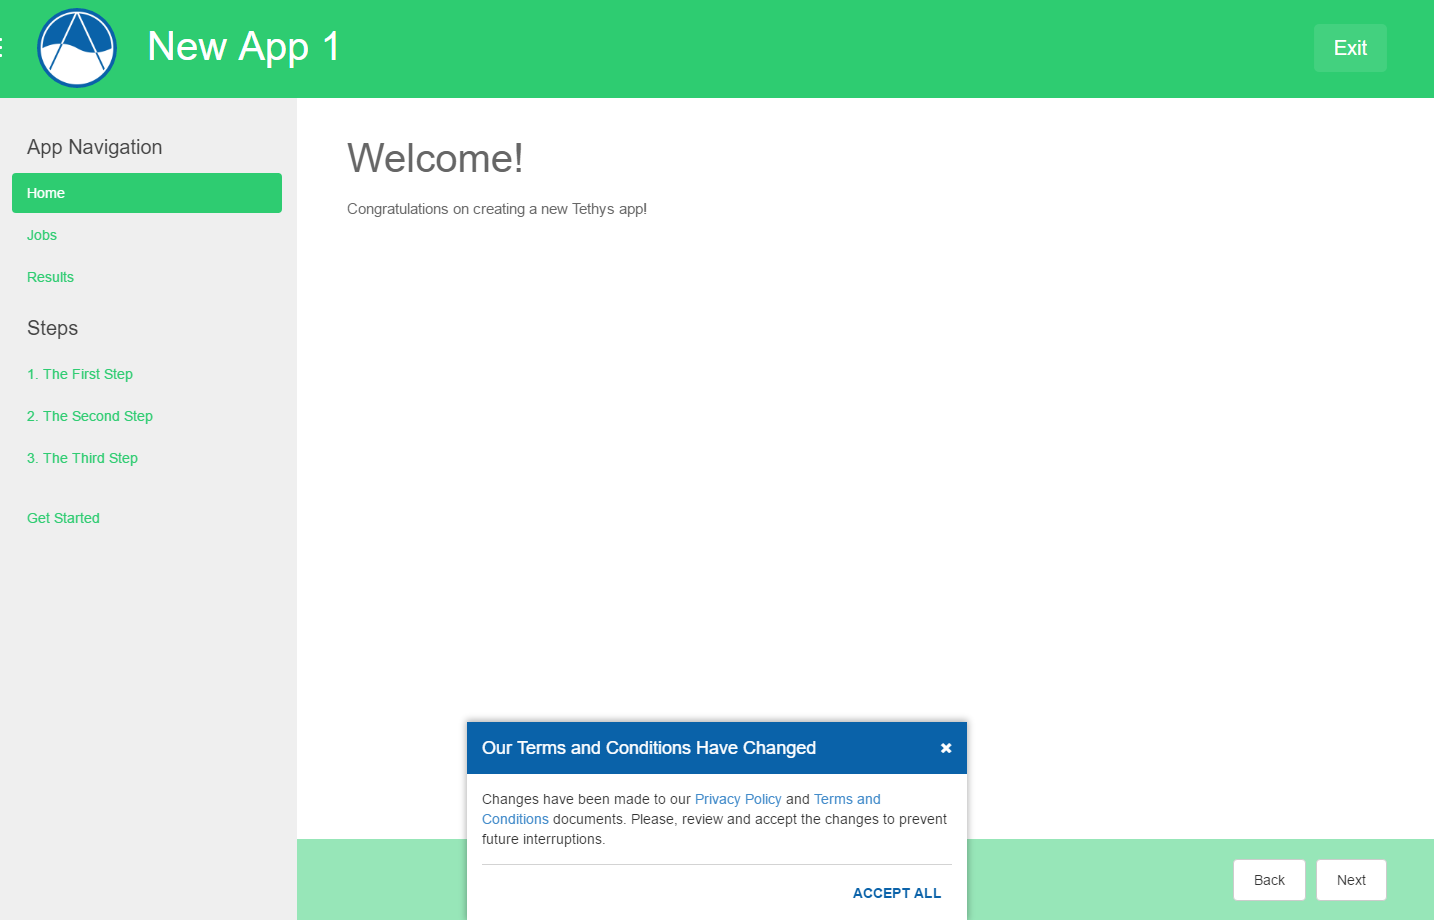
Figure 10. Terms and conditions modal.
Tethys Apps
The links under the TETHYS APPS heading can be used to manage settings for installed apps and extensions. Clicking on the Installed Apps or Installed Extensions links will show a list of installed apps or extensions. Clicking on a link for an installed app or extension will bring you to the settings page for that app or extension. There are several different types of app settings: Common Settings, Custom Settings, and Service Settings.
An app can be disabled by unchecking the Enabled checkbox in the app settings page. A 404 error will be displayed in place of the disabled app if a user tries to open the app. Disabled apps appear as transparent apps in the Apps Library to admin users and users with permissions to access the app. Other users will not see the app in the Apps Library.
An app can also be hidden from the Apps Library by unchecking the Show in apps library checkbox. Hidden apps can still be accessed directly through their URL endpoints by Admin users and users with app access permissions. In addition, Admin users can still see the app in the Apps Library, but the app icon appears transparent and with the hidden tag added to the app title. Users without permission to access the app cannot see the app in the Apps Library or access it directly through its URL endpoint.
Common Settings
The Common Settings include those settings that are common to all apps or extension such as the Name, Description, Tags, Enabled, Show in apps library, and Enable feedback (see Figure 11). Many of these settings correspond with attributes of the term:app class and can be overridden by the portal administrator. Other control the visibility or accessibility of the app.
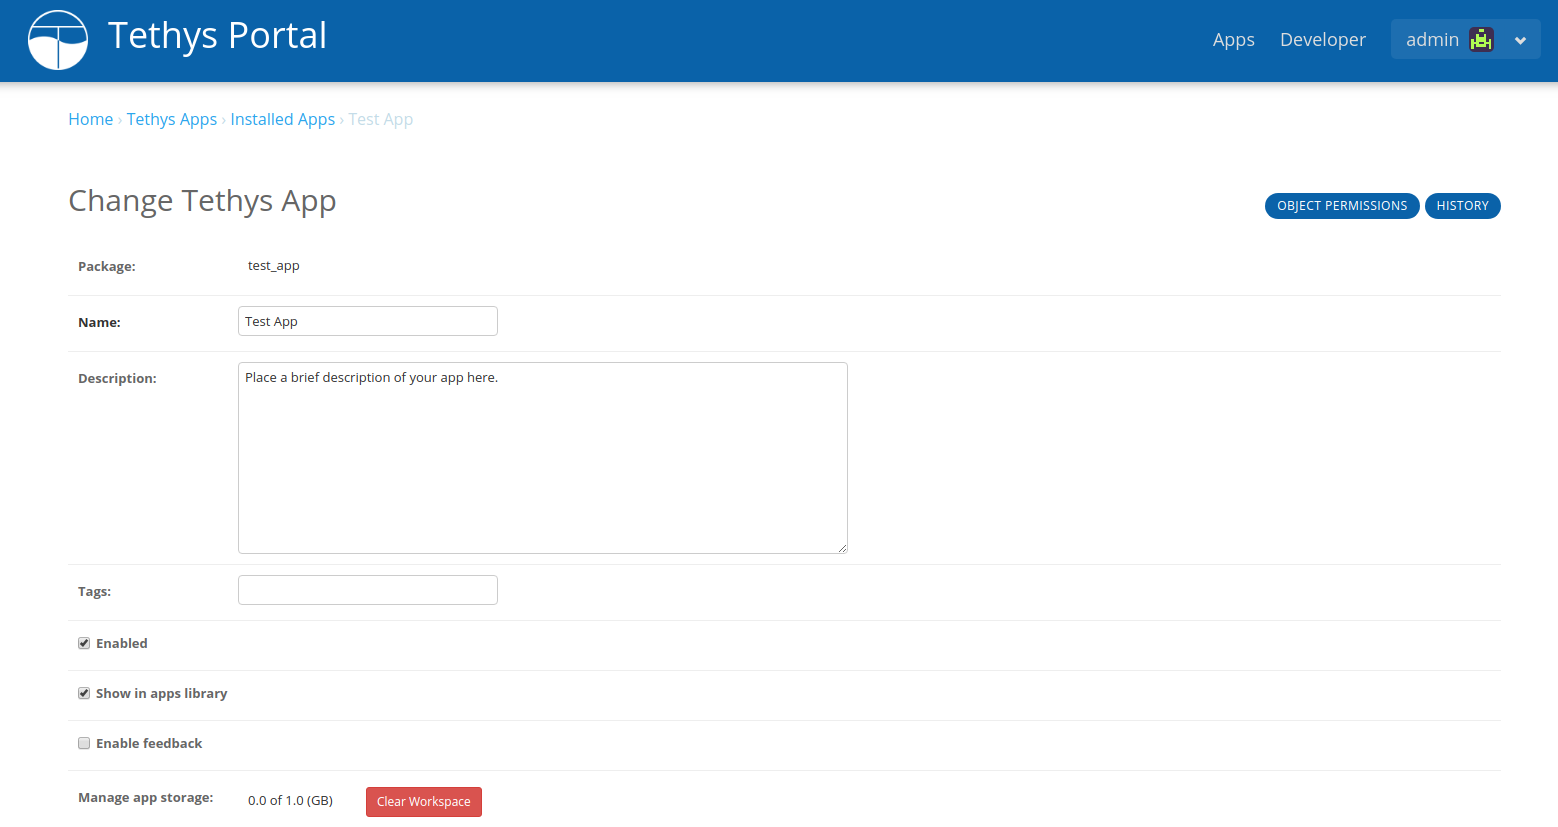
Figure 11. App settings page showing Common Settings.
Custom Settings
Custom Settings appear under the CUSTOM SETTINGS heading and are defined by the app developer (see Figure 12). Custom Settings have simple values such as strings, integers, floats, or booleans, but all are entered as text. For boolean type Custom Settings, type a valid boolean value such as True or False.
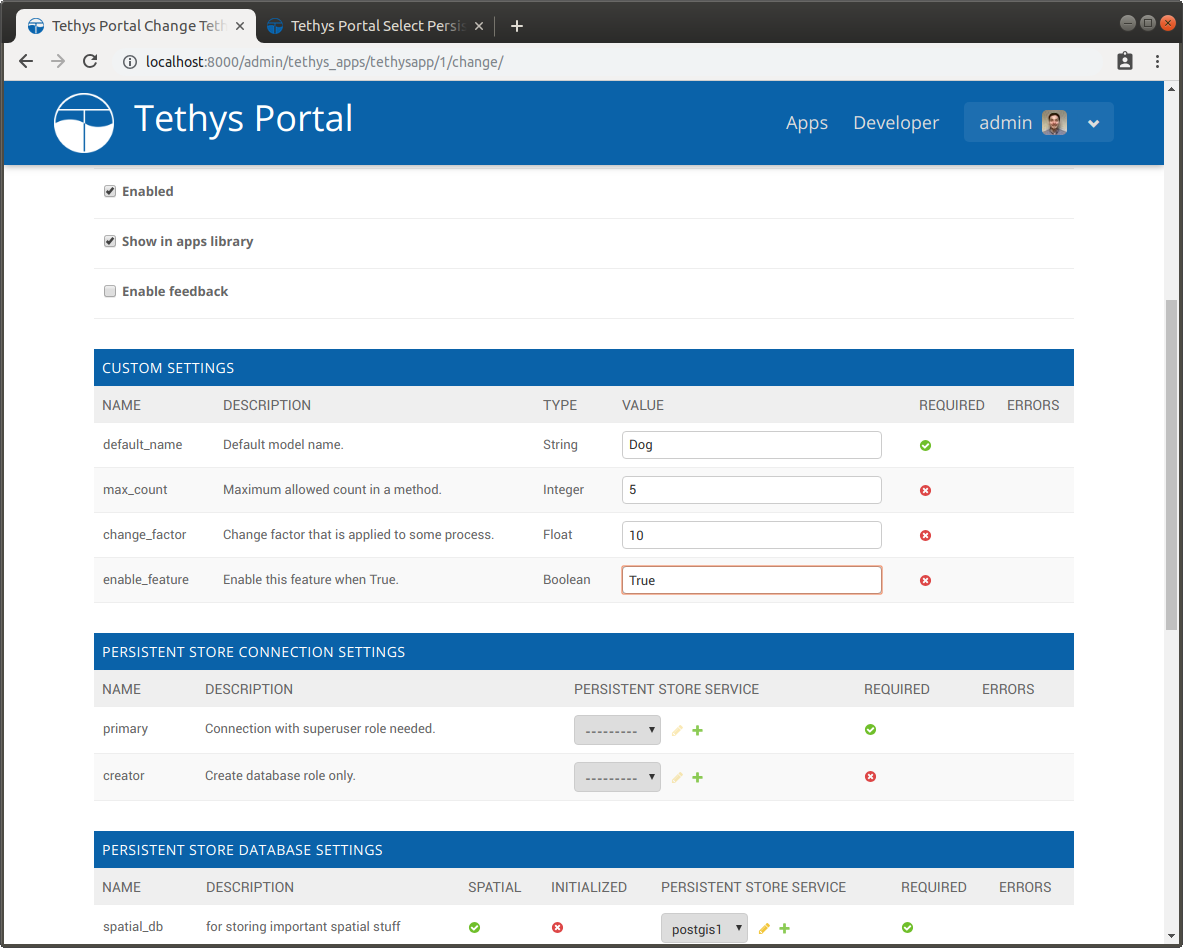
Figure 12. Custom Settings section of an app.
Service Settings
There are several different types of Service Settings including: Persistent Store Connection Settings, Persistent Store Database Settings, Dataset Service Settings, Spatial Dataset Service Settings, and Web Processing Service Settings (see Figure 13). These settings specify the types of services that the apps require. Use the drop down next to each Service Setting to assign a pre-registered Tethys Service to that app or use the plus button to create a new one.
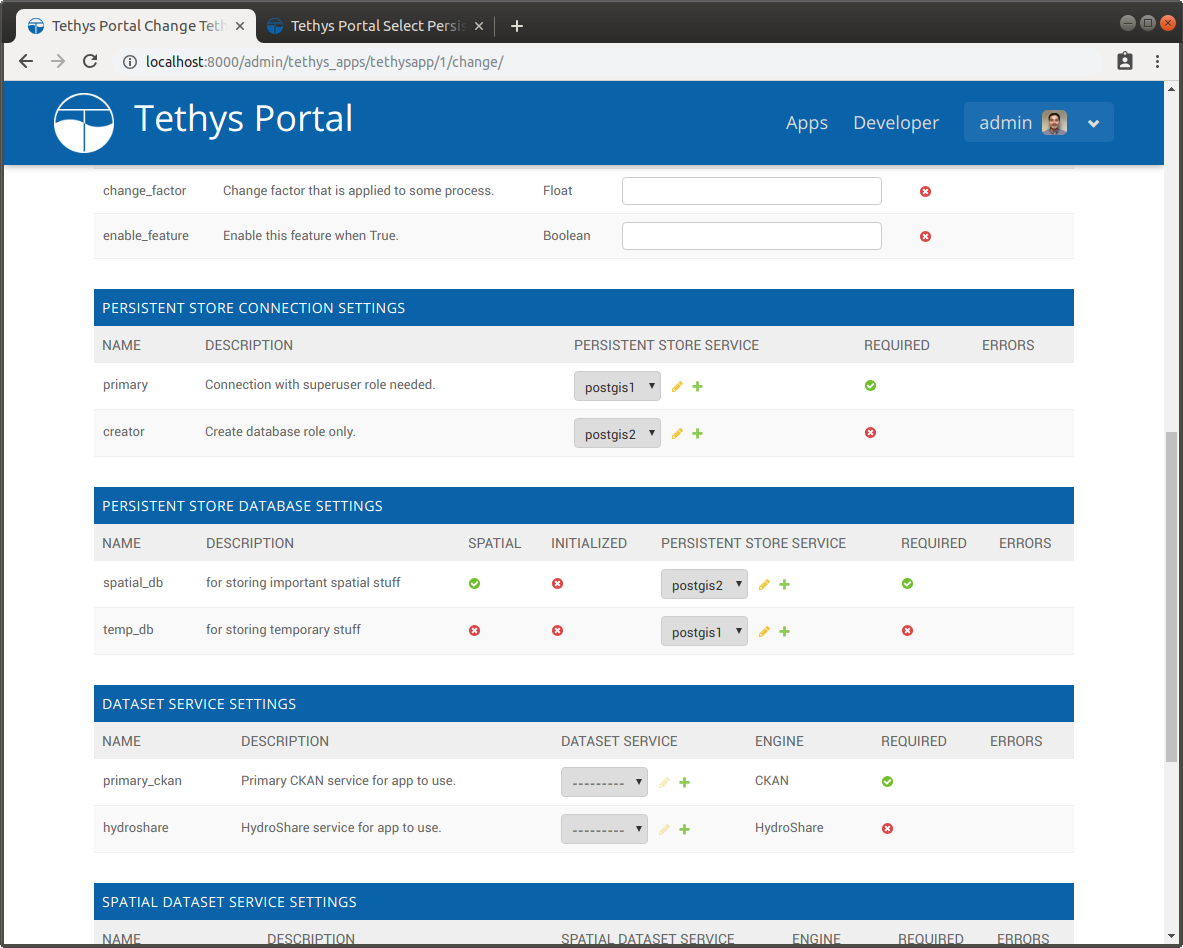
Figure 13. Service Settings sections of an app.
Tip
For information on how to define settings for your app see the App Settings API documentation. See Tethys Services for how to configure different Tethys Services.
Tethys Compute
The links under the TETHYS COMPUTE heading can be used to manage Jobs and Schedulers:
Tip
For more information on Tethys Jobs see the Jobs API and Compute API documentation.
Tethys Portal
The links under the TETHYS PORTAL heading can be used to customize the look of the Tethys Portal. For example, you can change the name, logo, and color theme of the portal (see Figure 9).
Figure 9. Home page settings for Tethys Portal.
Tip
For more information on customizing the Tethys Portal see the Customize Portal Theme (Recommended) documentation.
Tethys Quotas
The link under the TETHYS QUOTAS heading can be used to manage resource quotas that have been loaded into the Tethys Portal. Custom quotas can be created (see Creating Custom Quotas), but by default Tethys includes two quotas: User Workspace Quotas and App Workspace Quotas.
Resource Quotas
Resource Quotas shows a list of all loaded quotas. By default, all quotas are disabled when they are first loaded. Use this page to enable and customize the quotas for your portal (see Figure 10).
All quotas have the following fields that can be customized:
Default- Default quota value.Help- Help text to be displayed to users when a quota is exceeded.Active- Enable to enforce this quota.Impose default- When enabled the default quota will be used for users/apps that do not have a specific quota set. When disabled the quota will not be enforced on users/apps that do not have a specific quota set.
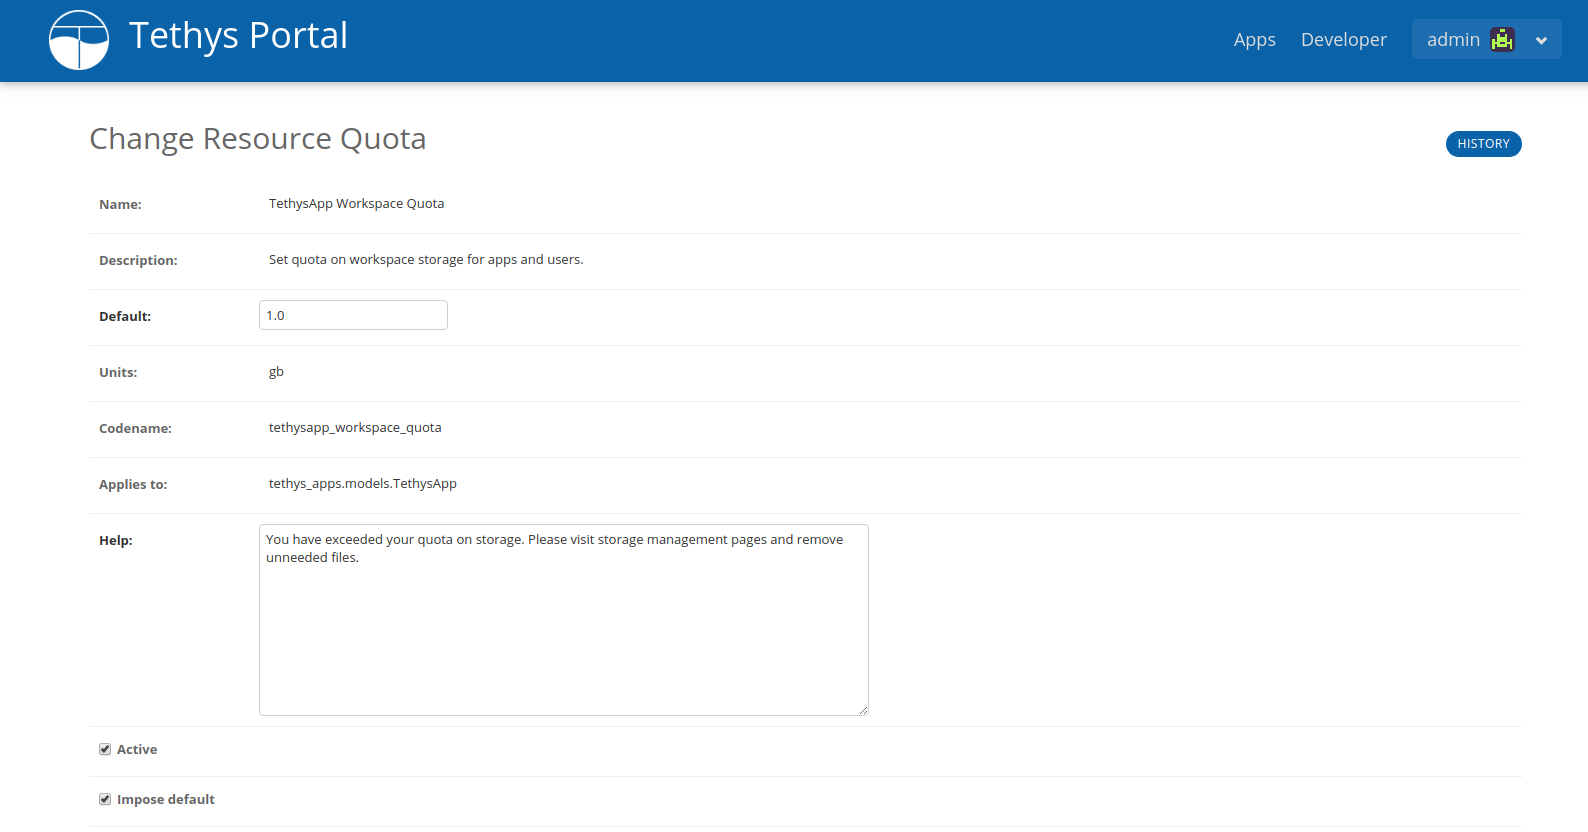
Figure 10. Resource Quota settings page.
User Workspace Quotas
To manage quotas specific to individual users, navigate to the user's settings page. Any applicable Resource Quotas will be listed in the User Quotas section. To set a custom quota for the user, enter the custom value in the Value field on the line corresponding to the appropriate Resource Quota. A link to the Resource Quota is also provided in the table (see Figure 11).
Tip
See Manage User Storage for details on how to manage user workspace storage.
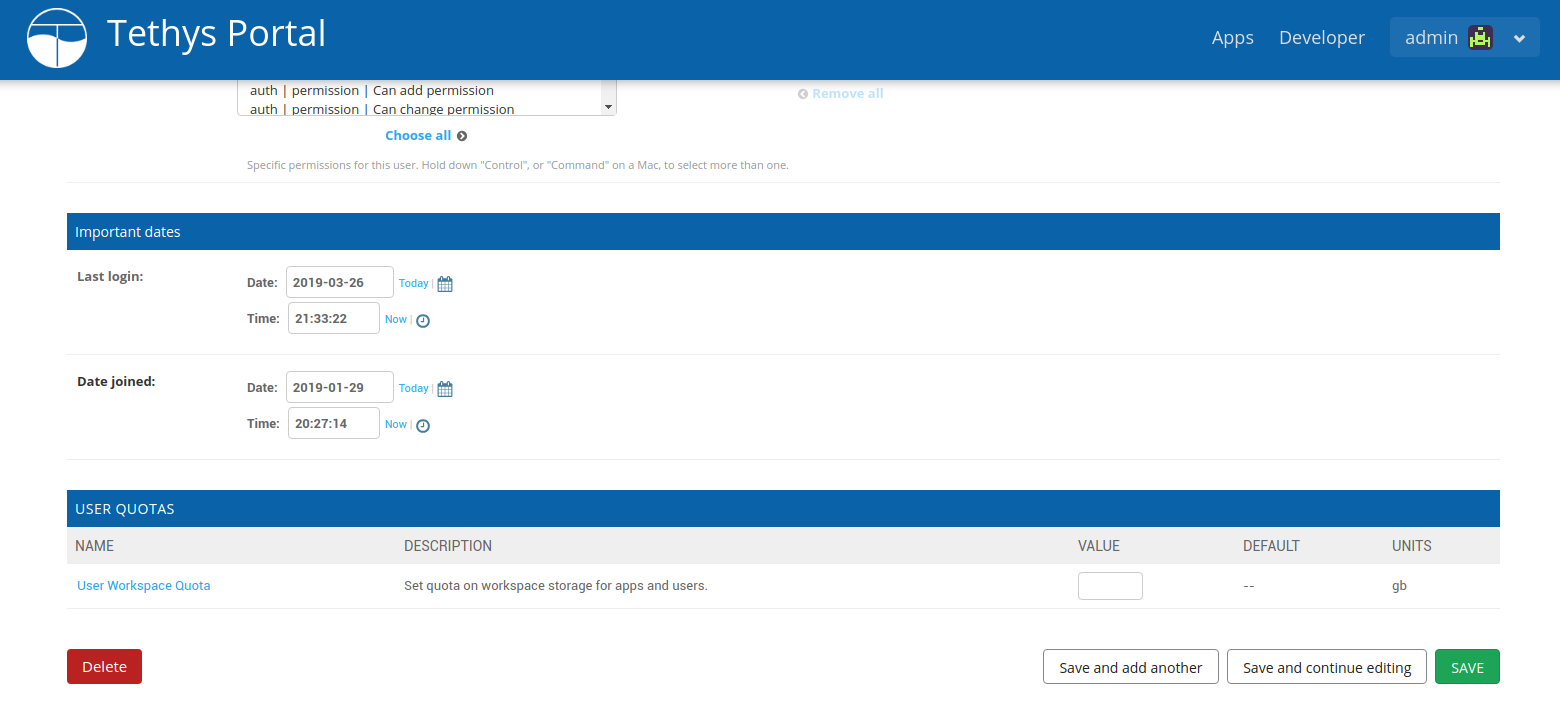
Figure 11. User settings page showing User Quotas.
App Workspace Quotas
To manage quotas specific to individual apps, navigate to the specified app's settings page. Any applicable Resource Quotas will be listed in the Tethys App Quotas section. To set a custom quota for the app, enter the custom value in the Value field on the line corresponding to the appropriate Resource Quota. A link to the Resource Quota is also provided in the table (see Figure 12).
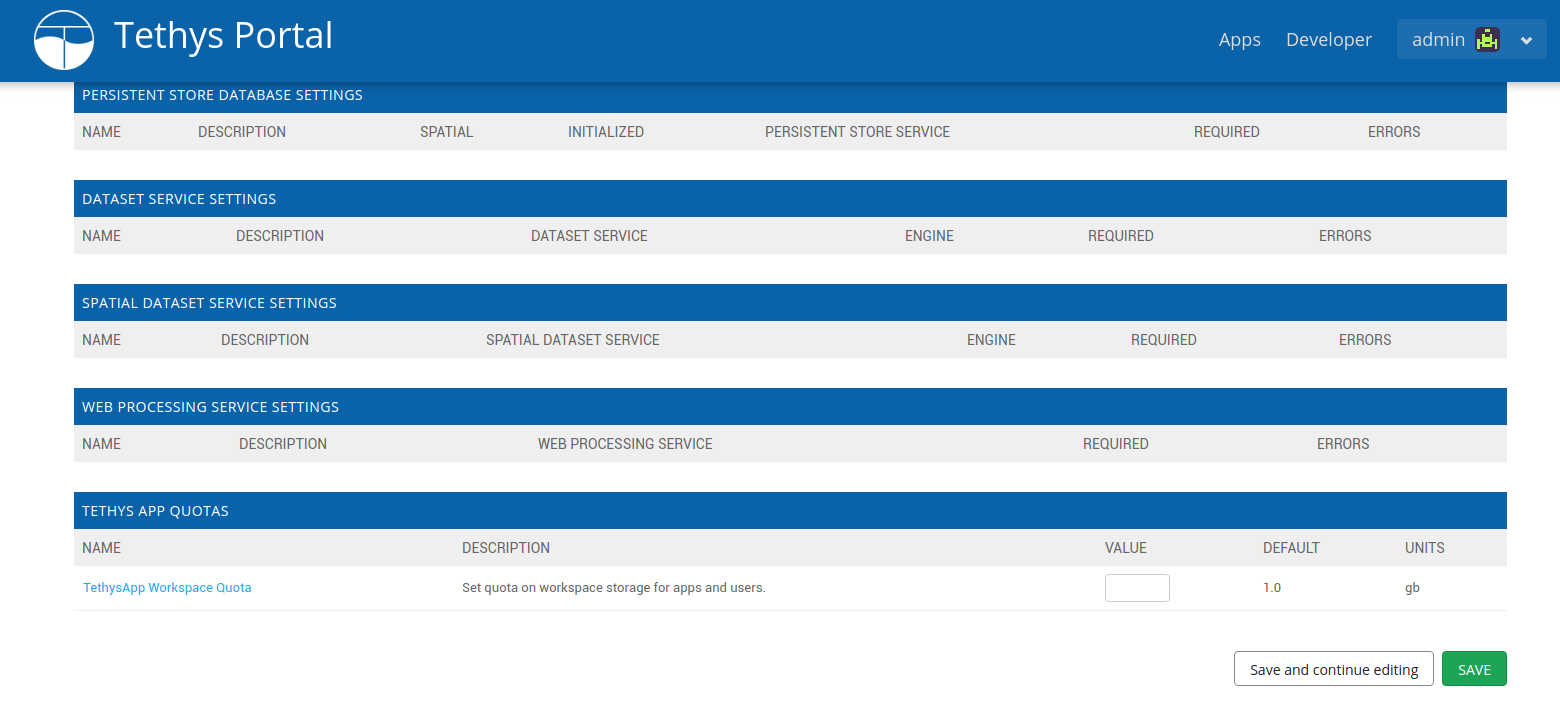
Figure 12. App settings page showing Tethys App Quotas.
Manage App Storage
Within the app settings page there is a Manage app storage section that provides a summary of the app workspace storage and the current quota being enforced on it (see Figure 6). To clear the workspace click the Clear Workspace button.
Warning
Clear Workspace will completely empty the app workspace.
Tip
See Handling Workspace Clearing for information on how to pre/post process the app workspace when it is cleared.
Tethys Services
The links under the TETHYS SERVICES heading can be used to register external services with Tethys Platform for use by apps and extensions. Use the Spatial Dataset Services link to register your Tethys Portal to GeoServer, the Dataset Services link to register to CKAN or HydroShare instances, the Web Processing Services link to register to WPS instances, or the Persistent Store Services link to register a database.
Tip
For detailed instructions on how to use each of these services in apps, refer to these docs: