Run with Docker Compose
Last Updated: February 2023
With the image built, its now time to run the container. Tethys Portal requires at least a database and a Redis server to run. The custom image that we have built will also require a THREDDS server. Both the database and THREDDS server can be created using a Docker images as well, but that means starting multiple Docker images with one that depends on the others. The easiest way to manage a multi-container deployment like this is with Docker Compose.
Docker Compose Overview
Docker Compose is best described by their documentation:
Compose is a tool for defining and running multi-container Docker applications. With Compose, you use a YAML file to configure your application’s services. Then, with a single command, you create and start all the services from your configuration. [1]
A simple Docker Compose YAML (docker-compose.yml) for a Django web application looks like this:
services:
  db:
    image: postgres
    volumes:
      - ./data/db:/var/lib/postgresql/data
    environment:
      - POSTGRES_DB=postgres
      - POSTGRES_USER=postgres
      - POSTGRES_PASSWORD=postgres
  web:
    build: .
    command: python manage.py runserver 0.0.0.0:8000
    volumes:
      - .:/code
    ports:
      - "8000:8000"
    depends_on:
      - db
Starting all the services in a Docker Compose YAML is done using the following command:
docker compose up
Note
In older version of Docker Compose, the command is:
docker-compose up
Here is a list of resources that you can use to learn more about Docker Compose:
Create Docker Compose Recipe
Use the following instructions to create a Docker Compose file for the custom Tethys Portal image that you created in the previous tutorial.
1. Create Data Directories
Docker allows directories from the host machine to be mounted into the containers. This is most often used to provide easy access to container data, configuration files, and logs.
- Create the following directories in
tethys_portal_dockerdirectory: mkdir -p data/db mkdir -p data/tethys mkdir -p data/thredds mkdir -p config/thredds mkdir -p keys/gee mkdir -p logs/tethys mkdir -p logs/thredds/thredds mkdir -p logs/thredds/tomcat
- Create the following directories in
- Download the default
tomcat-users.xmlfile from the Unidata/thredds-docker GitHub repository: -
Note
After clicking on the link above, you may need to right-click and select Save as... to download the file. Save the file as
tomcat-users.xml.
- Download the default
Add the
tomcat-users.xmlfile to theconfig/threddsdirectory.Create a service account key as described in Step 1 of the Google Earth Engine Service Account tutorial.
Place the
JSONfile containing the service account key in thekeys/geedirectory.
2. Create Docker Compose File
Create a new file called docker-compose.yml in the tethys_portal_docker directory:
touch docker-compose.yml
Add the following contents to the docker-compose.yml:
services:
  db:
  thredds:
  redis:
  web:
networks:
  internal:
    internal: true
  external:
Explanation
services: This section contains a list of services or containers and configuration for each. Three stubs are defined for the four containers that need to be defined for the custom image:
db,thredds,redis, andweb.networks (top-level): Networks that should be created. In this example two networks are defined, one that is internal, meaning only accessible to the containers that are connected to it, and one that is external, to allow access to the web container for example. To learn more about Docker networks, see: Networking overview | Docker Documentation.
3. Define Database Service
Tethys Platform works best with a PostgreSQL database and the apps will require one with the PostGIS extension installed. As such, the db service will be created using the official PostGIS image on Docker Hub: postgis/postgis | Docker Hub. This image extends the official PostgreSQL image on Docker Hub (postgres | Docker Hub), adding the PostGIS extension.
Add the following definition for the db service in the docker-compose.yml:
db:
  image: postgis/postgis:latest
  restart: always
  networks:
    - "internal"
  ports:
    - "5432:5432"
  env_file:
    - ./env/db.env
  volumes:
    - ./data/db:/var/lib/postgresql/data
Explanation
image: The Docker container image used to run the service.
restart: Set the restart policy for the container in the event of an outage or error.
networks (services): Networks for the container to join. The database does not need to be accessible externally, so it is only connected to the
internalnetwork.ports: Ports to expose on the container (
<host>:<container>).env_file: A file containing the environment variables to create for the container. Environment variables often contain sensitive information that should not be committed with the
docker-compose.yml. Thedb.envfile will be created in Step 7.- volumes: Mount directories from the host into the container or create Docker-managed named volumes. Volumes allow you to preserve data that would otherwise be lost when the container is removed. The syntax shown here is:
<host_dir>:<container_dir>. ./data/db:/var/lib/postgresql/data: The primary data directory for PostgreSQL database. This directory contains the data and configuration files for the database.
- volumes: Mount directories from the host into the container or create Docker-managed named volumes. Volumes allow you to preserve data that would otherwise be lost when the container is removed. The syntax shown here is:
4. Define THREDDS Service
The THREDDS Tutorial application requires a THREDDS service. Although this could be an external THREDDS service, as is used in the tutorial, a local THREDDS service will be created and linked in the Compose file for illustration. The thredds service will be created using the THREDDS Docker image developed by Unidata and available on Docker Hub: unidata/thredds-docker | Docker Hub.
Add the following definition for the thredds service in the docker-compose.yml:
thredds:
  image: unidata/thredds-docker:5.6
  restart: always
  networks:
    - "internal"
    - "external"
  ports:
    - "8080:8080"
  env_file:
    - ./env/thredds.env
  volumes:
    - ./data/thredds/:/usr/local/tomcat/content/thredds
    - ./logs/thredds/tomcat/:/usr/local/tomcat/logs/
    - ./logs/thredds/thredds/:/usr/local/tomcat/content/thredds/logs/
    - ./config/thredds/tomcat-users.xml:/usr/local/tomcat/conf/tomcat-users.xml
Explanation
image: The Docker container image used to run the service.
restart: Set the restart policy for the container in the event of an outage or error.
networks (services): Networks for the container to join. The THREDDS server is a map server and needs to be externally accessible, so it is added to both the
internalandexternalnetworks.ports: Ports to expose on the container (
<host>:<container>).env_file: A file containing the environment variables to create for the container. Environment variables often contain sensitive information that should not be committed with the
docker-compose.yml. Thethredds.envfile will be created in Step 7.- volumes: Mount directories from the host into the container or create Docker-managed named volumes. Volumes allow you to preserve data that would otherwise be lost when the container is removed. The syntax shown here is:
<host_dir>:<container_dir>. ./data/thredds/:/usr/local/tomcat/content/thredds: Main content directory for THREDDS. This directory will contain the data and XML configuration files for THREDDS../logs/thredds/tomcat/:/usr/local/tomcat/logs/: Logs for Tomcat, the server running THREDDS../logs/thredds/thredds/:/usr/local/tomcat/content/thredds/logs/: Logs for THREDDS../config/thredds/tomcat-users.xml:/usr/local/tomcat/conf/tomcat-users.xml: Tomcat user configuration file. Use this file to create user accounts for the THREDDS Data Manager service that is also run inside the container (see: THREDDS Data Manager (TDM) and Manager App HOW-TO | Tomcat Documentation).
- volumes: Mount directories from the host into the container or create Docker-managed named volumes. Volumes allow you to preserve data that would otherwise be lost when the container is removed. The syntax shown here is:
5. Define Redis Service
Redis is an open source, in-memory key-value store that is used by Tethys Platform in production as a message broker for supporting web sockets and other asynchronous capabilities provided by Django Channels. The redis service will be created using the official Redis Docker container image on Docker Hub: redis | Docker Hub.
Add the following definition for the redis service in the docker-compose.yml:
redis:
  image: redis:latest
  restart: always
  networks:
    - "external"
  ports:
    - "6379:6379"
Explanation
image: The Docker container image used to run the service.
restart: Set the restart policy for the container in the event of an outage or error.
networks (services): Networks for the container to join. The Redis server is does not need to be accessed externally, so it is added to only the
internalnetwork.ports: Ports to expose on the container (
<host>:<container>).
6. Define Tethys Service
With the service dependencies for the Tethys container defined, we can now implement the service definition for the Tethys container (web).
Add the following definition for the web service in the docker-compose.yml:
web:
  image: tethys-portal-docker:latest
  build: .
  restart: always
  depends_on:
    - "db"
    - "thredds"
    - "redis"
  networks:
    - "internal"
    - "external"
  ports:
      - "80:80"
  env_file:
    - ./env/web.env
  volumes:
    - ./data/tethys:/var/lib/tethys_persist
    - ./keys:/var/lib/tethys/keys
    - ./logs/tethys:/var/log/tethys
Explanation
image: The Docker container image used to run the service.
build: Specify the path to the build context (directory with the
Dockerfile).restart: Set the restart policy for the container in the event of an outage or error.
depends_on: Specify the dependency between services. In this case the
db,thredds, andrediscontainers will be started before thewebcontainer.networks (services): Networks for the container to join. The Tethys server needs to be externally accessible, so it is added to both the
internalandexternalnetworks.ports: Ports to expose on the container (
<host>:<container>).env_file: A file containing the environment variables to create for the container. Environment variables often contain sensitive information that should not be committed with the
docker-compose.yml. Theweb.envfile will be created in Step 7.- volumes: Mount directories from the host into the container or create Docker-managed named volumes. Volumes allow you to preserve data that would otherwise be lost when the container is removed. The syntax shown here is:
<host_dir>:<container_dir>. ./data/tethys:/var/lib/tethys_persist: Main content directory for Tethys Platform. This directory contains the app workspaces, static files, and configuration files including theportal_config.yml../log/tethys:/var/log/tethys: Logs for Tethys.
- volumes: Mount directories from the host into the container or create Docker-managed named volumes. Volumes allow you to preserve data that would otherwise be lost when the container is removed. The syntax shown here is:
7. Create Environment Files
Each of the Docker containers can be configured through the environment variables. While it is possible to specify these variables in the docker-compose.yml using the environment key, it is not recommended. This is because environment variables often contain sensitive information like usernames, passwords, and API keys and the docker-compose.yml is a file that is often committed to version control repositories. To prevent leaking sensitive information it is recommended that you use environment or .env files for storing this information and that you do not commit these files.
With that said, certain environment variables need to be defined for the custom Tethys Portal Compose recipe to work. This is often the case, so another pattern that is used is to provide default .env files that users can copy and modify. The default .env files are committed to the repository and the copies with sensitive information are not. In this step you will create the default .env files referenced in the env_file sections of the docker-compose.yml.
- Create a new
envdirectory in thetethys_portal_dockerdirectory for storing the.envfiles: mkdir env
- Create a new
- Create three new empty files in the
envdirectory with the same names as those referenced in the env_file sections of thedocker-compose.yml: touch env/db.env env/thredds.env env/web.env
- Create three new empty files in the
- Add the following contents to each
.envfile: db.env
# Password of the db admin account
POSTGRES_PASSWORD=please_dont_use_default_passwords
Tip
Review documentation on Docker Hub for the PostgreSQL and PostGIS images for an explanation of the environment variables that are available (see: postgis/postgis | Docker Hub and postgres | Docker Hub).
Important
For Production Deployments:
For a production deployment, set
POSTGRES_PASSWORDwith a secure password (see: Preparation).thredds.env
# Password of the TDM admin user
TDM_PW=please_dont_use_default_passwords

# FQDN of the server THREDDS is running on
TDS_HOST=http://localhost

# Maximum Memory for THREDDS
THREDDS_XMX_SIZE=4G

# Minimum Memory for THREDDS
THREDDS_XMS_SIZE=4G

# Maximum Memory for TDM
TDM_XMX_SIZE=6G

# Minimum Memory for TDM
TDM_XMS_SIZE=1G
Tip
Review documentation on Docker Hub for the THREDDS image for an explanation of the environment variables that are available (see: unidata/thredds-docker | Docker Hub).
Important
For Production Deployments:
Set
THREDDS_PASSWORDwith a secure password and setTDS_HOSTtoSERVER_DOMAIN_NAME(see: Preparation). Set the memory parameters carefully to fit within the memory constraints of your server.web.env
TERM=xterm

# Domain name of server should be first in the list if multiple entries added
ALLOWED_HOSTS="\"[localhost]\""

# Don't change these parameters
ASGI_PROCESSES=1
CHANNEL_LAYERS_BACKEND=channels_redis.core.RedisChannelLayer
CHANNEL_LAYERS_CONFIG="\"{'hosts':[{'host': 'redis', 'port': 6379}]}\""  # Hostname is the name of the service

# Database parameters
TETHYS_DB_HOST=db  # Hostname is the name of the service
TETHYS_DB_PORT=5432
TETHYS_DB_ENGINE=django.db.backends.postgresql
TETHYS_DB_NAME=tethys_platform
TETHYS_DB_USERNAME=tethys_default
TETHYS_DB_PASSWORD=please_dont_use_default_passwords
TETHYS_DB_SUPERUSER=tethys_super
TETHYS_DB_SUPERUSER_PASS=please_dont_use_default_passwords

# POSTGRES_PASSWORD should be the same as that in the db.env
POSTGRES_PASSWORD=please_dont_use_default_passwords

# Default admin account for Tethys Portal
PORTAL_SUPERUSER_NAME=admin
PORTAL_SUPERUSER_PASSWORD=please_dont_use_default_passwords
PORTAL_SUPERUSER_EMAIL=you@email.com

# App specific settings
DAM_INVENTORY_MAX_DAMS=50
EARTH_ENGINE_PRIVATE_KEY_FILE=/var/lib/tethys/keys/gee/some-key.json
EARTH_ENGINE_SERVICE_ACCOUNT_EMAIL=you@email.com

# THREDDS parameters
THREDDS_TUTORIAL_TDS_USERNAME=admin
THREDDS_TUTORIAL_TDS_PASSWORD=please_dont_use_default_passwords
THREDDS_TUTORIAL_TDS_PRIVATE_PROTOCOL=http
THREDDS_TUTORIAL_TDS_PRIVATE_HOST=thredds  # Endpoint backend (Python) will use, hostname is the name of the service
THREDDS_TUTORIAL_TDS_PRIVATE_PORT=8080
THREDDS_TUTORIAL_TDS_PUBLIC_PROTOCOL=http
THREDDS_TUTORIAL_TDS_PUBLIC_HOST=localhost  # Endpoint the frontend (JavaScript) will use
THREDDS_TUTORIAL_TDS_PUBLIC_PORT=8080
Tip
For an explanation of all the environment variables provided by the Tethys Platform image see: Environment Variables.
Important
For Production Deployments:
Replace
localhostin theALLOWED_HOSTSsetting with<SERVER_DOMAIN_NAME>and setTETHYS_DB_USERNAME,TETHYS_DB_PASSWORD,TETHYS_DB_SUPER_USERNAME,TETHYS_DB_SUPERUSER_PASS,POSTGRES_PASSWORD,PORTAL_SUPERUSER_NAME,PORTAL_SUPERUSER_PASSWORD, andPORTAL_SUPERUSER_EMAILwith appropriate values (see: Preparation).Also set the
DAM_INVENTORY_MAX_DAMSsetting to the desired maximum number of dams for the Dam Inventory app and set theEARTH_ENGINE_SERVICE_ACCOUNT_EMAILto the email address associated with your Google Earth Engine service account and replace thesome-key.jsonwith the name of your keyfile in theEARTH_ENGINE_PRIVATE_KEY_FILEsetting (see: Google Earth Engine Service Account). Set theTHREDDS_PASSWORDshould be set to matchTDM_PWin thethredds.env.
- Add the following contents to each
8. Update README
Update the contents of the README with instructions for using the repository and Docker compose recipe by adding the following lines:
# Checkout

```
git clone --recursive-submodules https://github.com/tethysplatform/tethys_portal_docker.git
```

# Build

```
docker compose build web
```

# Run

1. Create Data Directories

```
mkdir -p data/db
mkdir -p data/tethys
mkdir -p data/thredds
mkdir -p keys/gee
mkdir -p logs/tethys
mkdir -p logs/thredds/thredds
mkdir -p logs/thredds/tomcat
```

2. Acquire a Earth Engine Service Account and Key file (see Step 1 of [Google Earth Engine Service Account](http://docs.tethysplatform.org/en/stable/tutorials/google_earth_engine/part_3/service_account.html)).

3. Add the Google Earth Engine service account JSON key file to the `keys/gee` directory.

4. Create copies of the `.env` files in the `env` directory and modify the settings appropriately.

5. Update `env_file` sections in the `docker-compose.yml` to point to your copies of the `.env` files.

6. Start containers:

```
docker compose up -d
```
9. Commit Changes
The contents of the data, logs, and keys directories should not be committed into the Git repository because they contain large amounts of instance-specific data and sensitive information.
- Create a
.gitignorefile: touch .gitignore
- Create a
- Add the following contents to the
.gitignorefile to omit the contents of these directories from being tracked: data/ keys/ logs/
- Add the following contents to the
- Stage changes and commit the changes as follows:
git add .
git commit -m "Added Docker Compose recipe"
Run Docker Compose Recipe
Use the following steps to run the docker-compose.yml and verify that it works.
1. Start Containers
To start the containers run the following command in the directory with the docker-compose.yml file (tethys_portal_docker):
docker compose up -d
Note
In older version of Docker Compose, use docker-compose <command> instead of docker compose <command>.
2. Check Status
Check the status of the containers by running this command:
docker compose ps
3. Inspect Logs
It will take several minutes for the Tethys container to start up the first time as it needs to complete the initialization steps in the Salt State files. Monitor the logs for the Tethys container so that you know when it completes as follows:
docker compose logs -f web
When the Salt State files have finished running you will get a report like the one below, but until then, there won't be much output. Be patient.
tethys_portal_docker-web-1  | Summary for local
tethys_portal_docker-web-1  | -------------
tethys_portal_docker-web-1  | Succeeded: 35 (changed=35)
tethys_portal_docker-web-1  | Failed:     0
tethys_portal_docker-web-1  | -------------
tethys_portal_docker-web-1  | Total states run:     35
tethys_portal_docker-web-1  | Total run time:  147.540 s
Above this summary will be a summary for each of the Salt State steps executed. For example, here is the output from the Create_PostGIS_Database_Service step:
tethys_portal_docker-web-1  | ----------
tethys_portal_docker-web-1  |           ID: Create_PostGIS_Database_Service
tethys_portal_docker-web-1  |     Function: cmd.run
tethys_portal_docker-web-1  |         Name: . /opt/conda/bin/activate tethys && tethys services create persistent -n tethys_postgis -c tethys_super_user:mysupersecretpassword@db:5432
tethys_portal_docker-web-1  |       Result: True
tethys_portal_docker-web-1  |      Comment: Command ". /opt/conda/bin/activate tethys && tethys services create persistent -n tethys_postgis -c tethys_super_user:******@db:5432" run
tethys_portal_docker-web-1  |      Started: 22:56:45.620825
tethys_portal_docker-web-1  |     Duration: 3718.461 ms
tethys_portal_docker-web-1  |      Changes:
tethys_portal_docker-web-1  |               ----------
tethys_portal_docker-web-1  |               pid:
tethys_portal_docker-web-1  |                   173
tethys_portal_docker-web-1  |               retcode:
tethys_portal_docker-web-1  |                   0
tethys_portal_docker-web-1  |               stderr:
tethys_portal_docker-web-1  |               stdout:
tethys_portal_docker-web-1  |                   ?[94mLoading Tethys Extensions...?[0m
tethys_portal_docker-web-1  |                   ?[94mLoading Tethys Apps...?[0m
tethys_portal_docker-web-1  |                   ?[94mTethys Apps Loaded: ?[0mbokeh_tutorial, dam_inventory, earth_engine, postgis_app, thredds_tutorial
tethys_portal_docker-web-1  |
tethys_portal_docker-web-1  |                   ?[32mSuccessfully created new Persistent Store Service!?[0m
tethys_portal_docker-web-1  | ----------
The Salt State report can be incredibly useful for debugging issues when something goes wrong with the portal deployment. Checking them should be your first action when a Tethys Portal doesn't come up as expected.
Press CTRL-C to exit the tethys logs command.
4. View Running Portal
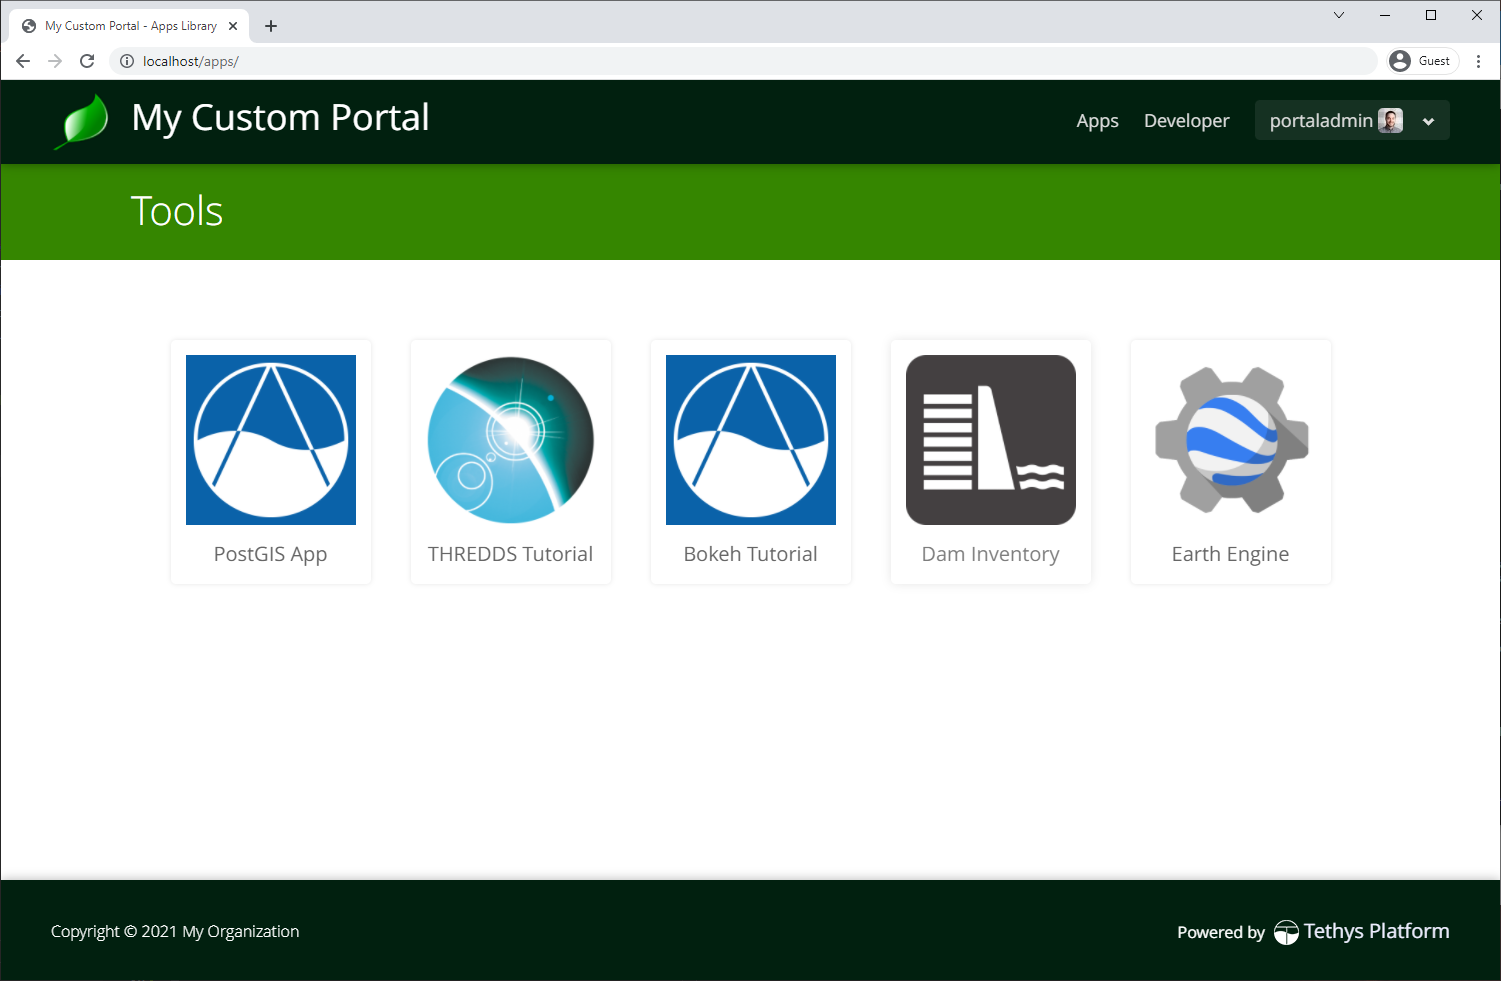
In a web browser, navigate to web address of the running portal (Figure 1). If using the default configuration, it will be accessible at http://localhost on the host machine. You may also want to view the THREDDS server catalog, which will be running at http://localhost:8080/thredds with the default config.
5. Review Mounted Directory Contents
Inspect the contents of the various directories that were mounted into the containers (i.e.: data, logs, config). Notice how the logs for Tethys and THREDDS are easily accessible. As is the portal_config.yml (see data/tethys/portal_config.yml). Data can be easily added to the THREDDS server by adding it to the data/thredds/public directory and then modifying the catalog.xml.
Tip
Use the contents of these directories to debug and make configuration changes as needed. Be sure to restart the affected container after making changes to configuration (see below).
Solution
This concludes this portion of the tutorial. You can view the solution on GitHub at https://github.com/tethysplatform/tethys_portal_docker or clone it as follows:
git clone https://github.com/tethysplatform/tethys_portal_docker
cd tethys_portal_docker
git checkout -b docker-compose-solution docker-compose-solution-4.5
Useful Docker Compose Commands
Login to a Container
Sometimes you may need to log in to one of the running containers to debug or modify a config that isn't exposed through the data directories. Use the docker compose exec command as follow to do so:
docker compose exec web -- /bin/bash
When you are done, run the exit command.
Tip
You can also use the exec command to run one-off commands inside a container. Just replace the /bin/bash with the desired command:
docker compose exec web -- ls
Restart Containers
The containers can be stopped, started, or restarted with the following commands:
docker compose stop
docker compose start
docker compose restart
An individual container can also be controlled using by providing its service name as an argument to these commands:
docker compose stop web
docker compose start web
docker compose restart web
Build
You can use docker compose to build the custom Tethys image. It will use the value of image as the tag:
docker compose build web
Remove Containers
The down command stops the containers if they are running and removes them:
docker compose down
Caution
Be careful with this command. Everything will be removed except for data contained in the directories that were mounted!
Troubleshooting
Google Earth Engine imagery is not displaying
Check the tethys.log (logs/tethys/tethys.log). Look for an ee.ee_exception.EEException and follow the instructions.
THREDDS App is Returning a 500 Error
This is because the THREDDS server doesn't have the data expected.
Footnotes